
A true tale of a family man with 3 boys, minimal construction skills and no free time, who builds a Finnish sauna in his Minneapolis basement.
My childhood home in Minnesota had a sauna in the basement. My Dad and Grandfather had built another old-school wood burning sauna up at our cabin on Bay Lake. Taking saunas had been a big part of my entire life. My dream has always been to have a sauna in my home for my family to enjoy together.
I know enough about projects to get into trouble, but this was a big ask to make into a reality, especially since I wanted to complete the project myself.
2 years ago, my family moved 3 blocks down the street from a charming, little cape cod-style home, with 1 bathroom that we lived in for 17 years to a little larger home with some more space for our 3 growing boys.
The new home is a rambler, built in 1946 with a basement that was mostly finished, but it had an odd, unfinished storage corner space – consisting of 2 smallish rooms with old light bulbs dangling down, no insulation, bare, concrete floors – most likely, a 1940’s root cellar. Upon moving in, this space became our family’s over-sized junk drawer of a space. Chock-full of wire-rack shelving, hockey bags and everything else that didn’t have a home. It was a cold, dead space.
When I first peeked into this room upon moving in – a warm light of inspiration went off, this would make a perfect sauna one day. (Unfortunately, I couldn’t find any “before” pictures of these two rooms from the family junk drawer days.)
Then, life happened. One day dreams were moved to the back burner as we unpacked boxes, moved in and drove off to hockey tournaments in amazing, far-away places like, Fargo.

I began a Pinterest page with early sauna ideas and inspo. I started sketching crude things and listing little add-ons to my pipe dream, even taking rough initial measurements. I met people who had built saunas and I listened, I followed others online and kept dreaming of my warm gathering place.

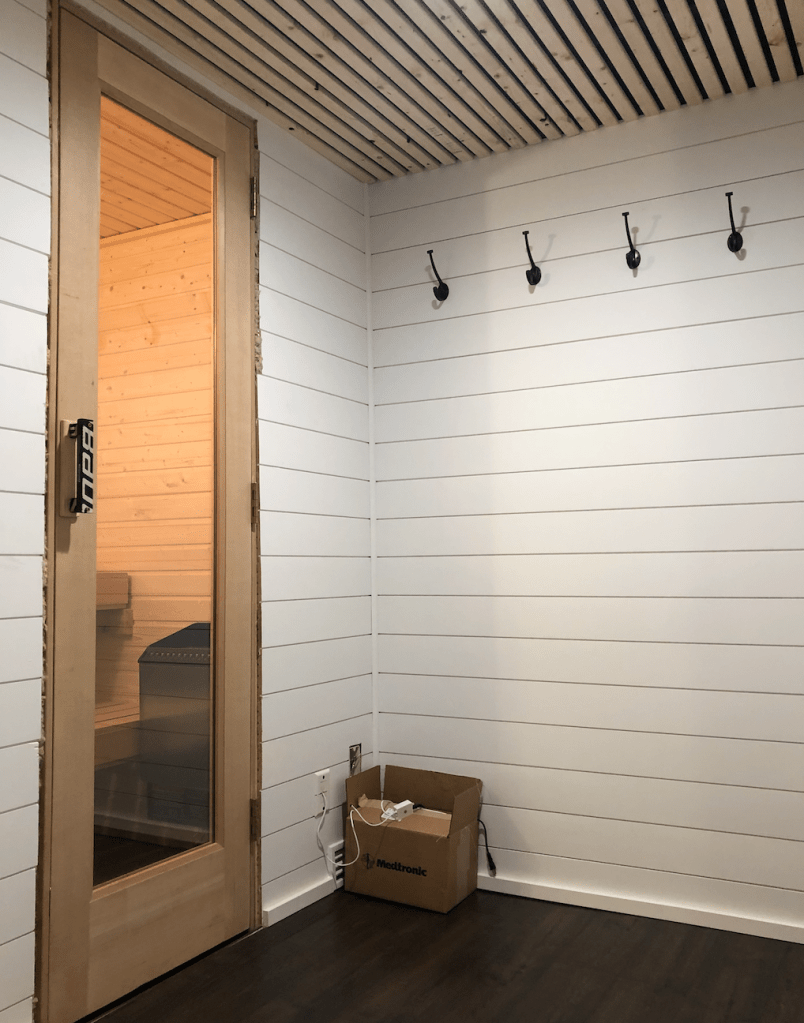
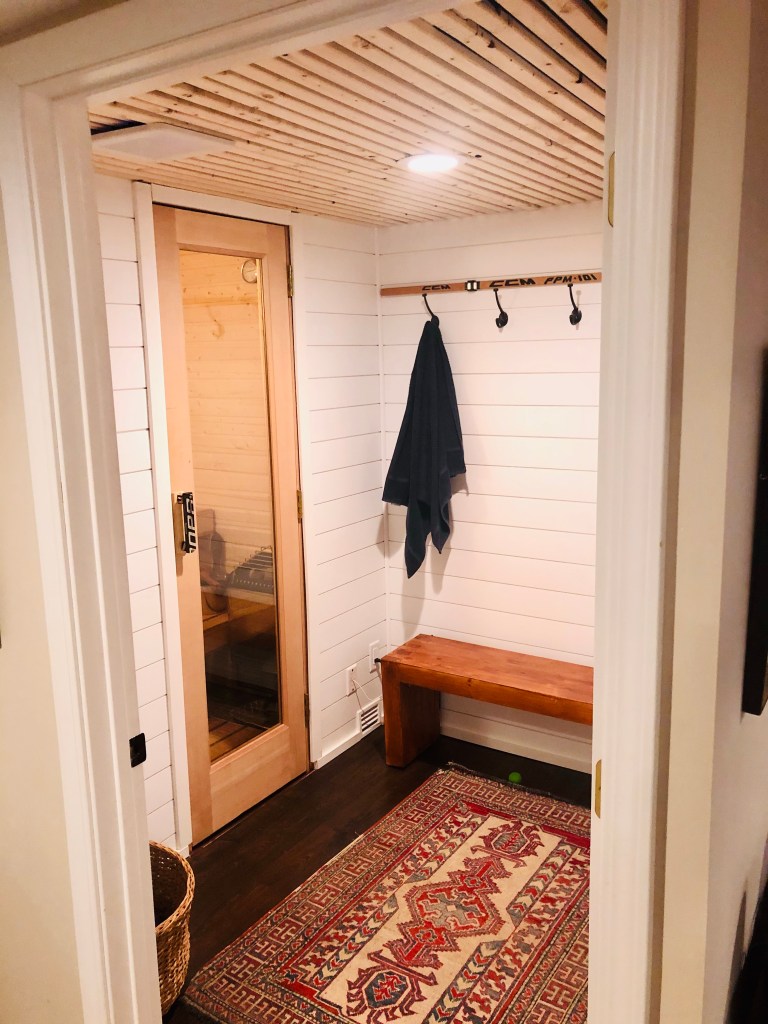
The small root cellar room was about 6’ wide by 5 and a half feet and a 7-foot ceiling. A perfect sauna space – or so the internet told me. The other, connected larger room would be the changing room – with hooks for towels and clothes with a bench and maybe even a vintage hockey stick hung on the wall.
March 31st – It begins
On a random Saturday morning, I had a rare, small window of time and began clearing theses two rooms out. After many trips to Goodwill and the garbage, moving shelves and things to another storage room – it was cleared out.
Then, I scrubbed it clean. Vacuumed up cobwebs and I bleached the floors.
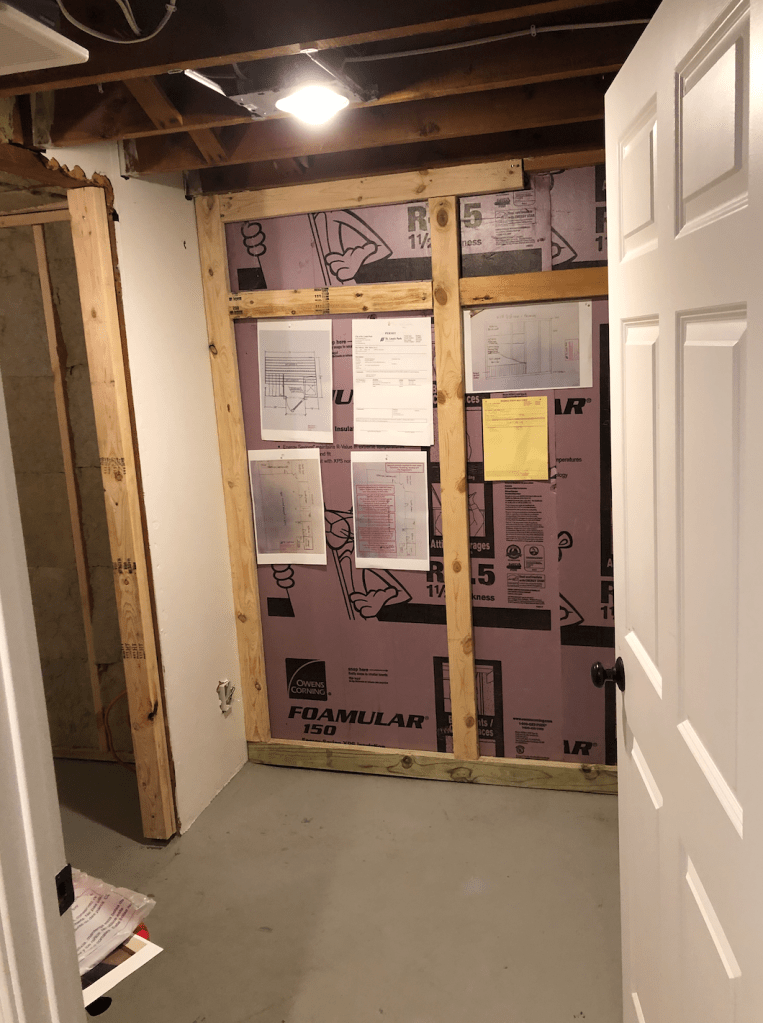
April 6th – Pink panther insulation and framing crew
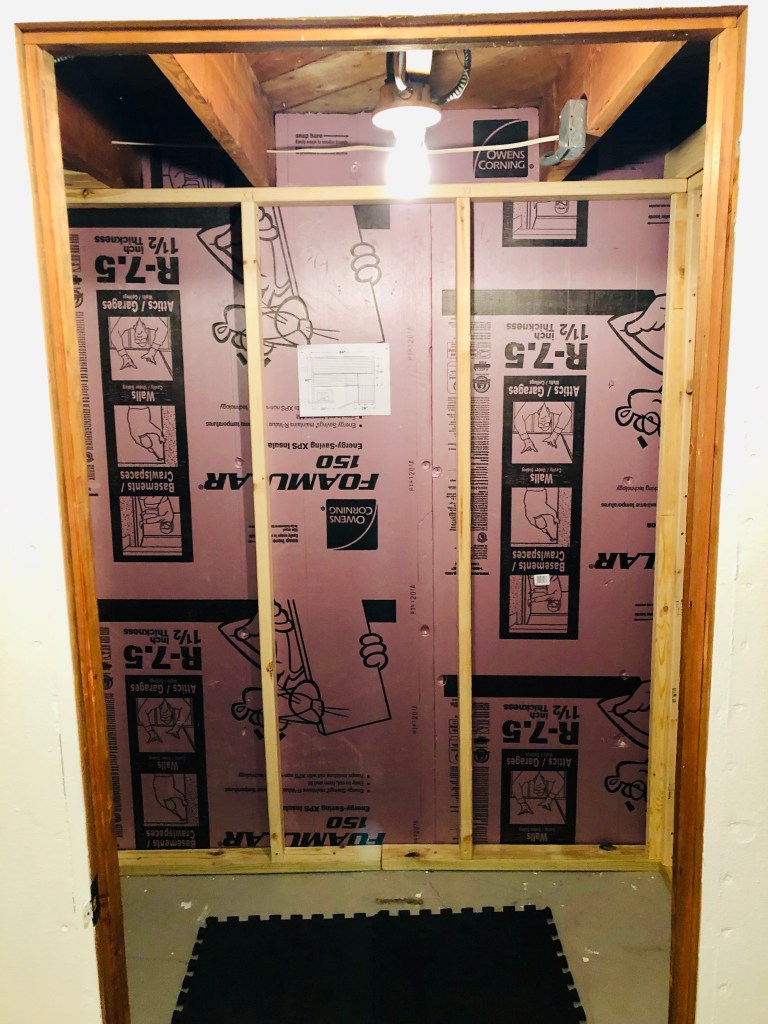
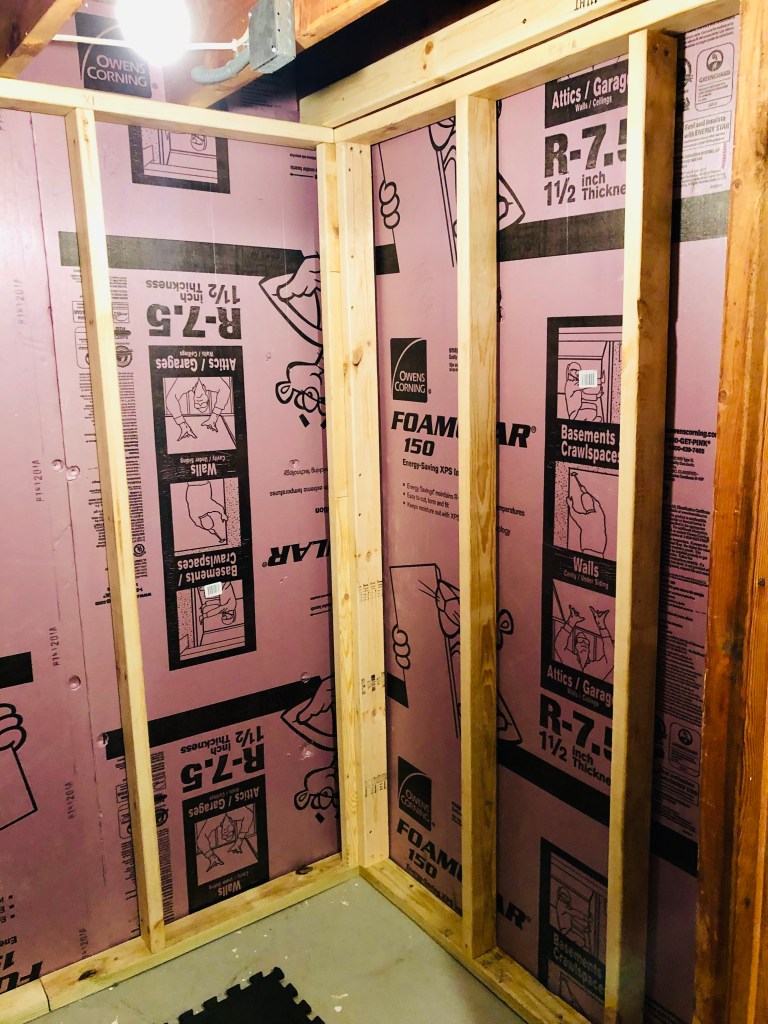
A buddy of mine is in home construction, he was throwing away a bunch of Owens Corning rigid pink insulation boards. I rushed over and hauled about 10 of them back home. I cut them to fit and covered up the ice-cold cement brick walls. I spray foamed them into place and the little rooms began to transform. Another construction buddy who was framing a basement nearby agreed to stop over and help me frame in the sauna room. They had a little free time and popped over with saws a blazin’ and framed it up in in about an hour or so. Unreal. The smell of fresh-cut wood in this little space set my dreams in high gear.
Then a hockey coaching buddy of mine introduced me to a Finnish sauna building master.
“Call my buddy, Matty”, Carl said. And I began a marathon texting relationship with Matt that lasted over 7 months.
Matt Bergstrom is a sauna whisperer.
Matt works for Helo Sauna & Steam in Cokato, MN. I called him and he quickly let me know what I would need to do and what to expect. What kind of wood for the walls, the benches, the stove, insulation, foil barriers, and more. He said he’d keep his eyes out for some scratch and dent heaters and possibly a door & wood. We could start designing the space. I was spinning in Finnish – and I’m Irish.
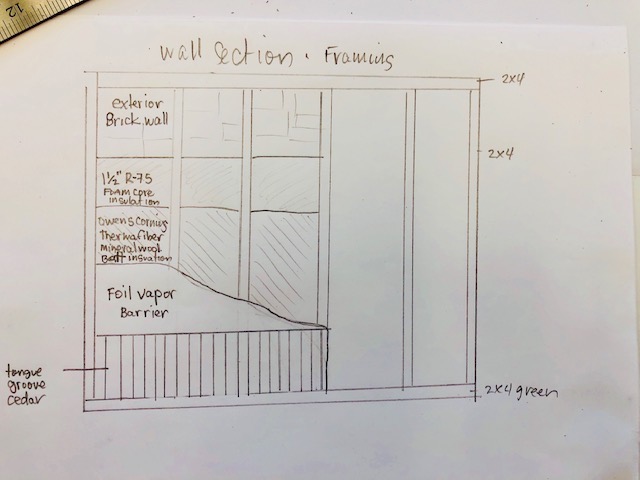
Now I had a real Finnish sauna connection and a lifeline to making my sauna dream a reality. We began going back and forth drawing up plans that would fit into the space. After much deliberation we came up with this basic design.
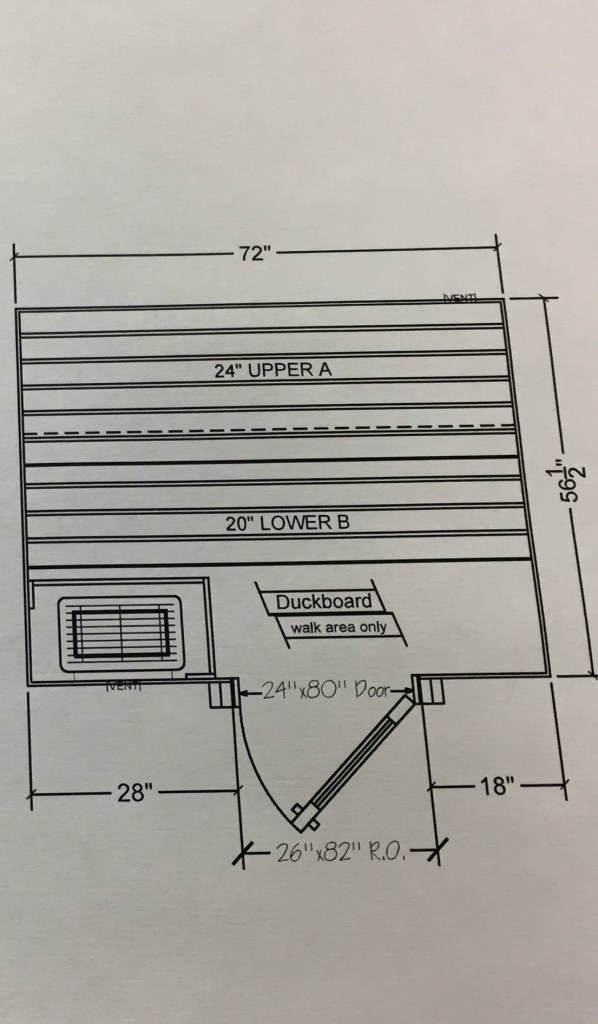
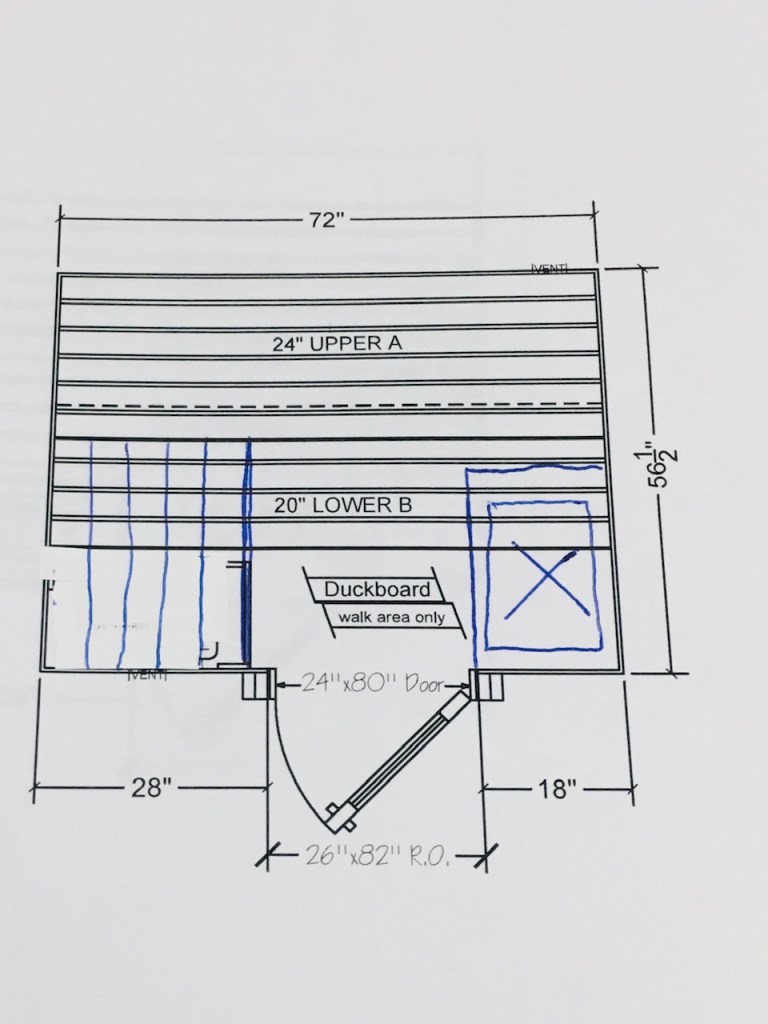
After thinking about it and doing some further doodling. I thought it would make more sense to try and move the heater over and add an L bench on the top row for extra seating in this small space.
The next step was a big and a little dangerous. 240 volts of electricity.
I know some things, but beyond wiring a door bell, electricity is not one of them. I had a hockey-dad buddy who knows construction things, I invited him to stop by for a couple beers to show him the space and get his thoughts.
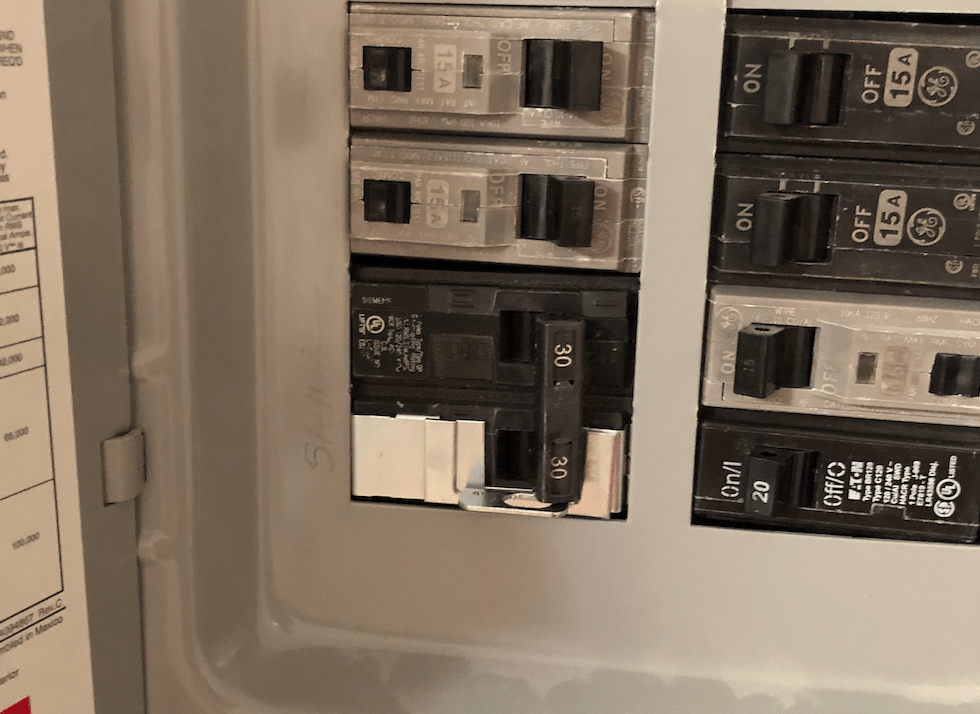
A couple quick issues were quickly brought up. The electrical box was on the opposite side of the basement. And the floor joists are running the wrong way. I had learned that I needed to get a big ol’ 10-3 wire from the new 30-amp breaker in the electrical box to this space – and we had a lot of finished spaces and ceiling in-between the two. Needle scratch.
Shit. This was not going to be easy. But, when is building a sauna in your basement ever going to be – easy?
It was now April and I wanted to build a sauna in my basement before the thermometer plummets again the following fall.
What if…we run the 10-3 electrical wire outside the home? My thought was to go from the box – pop out of the house in the unfinished laundry room and run the buried wire the length of the house and pop back in right above the sauna space. Brilliant. Can you do that?
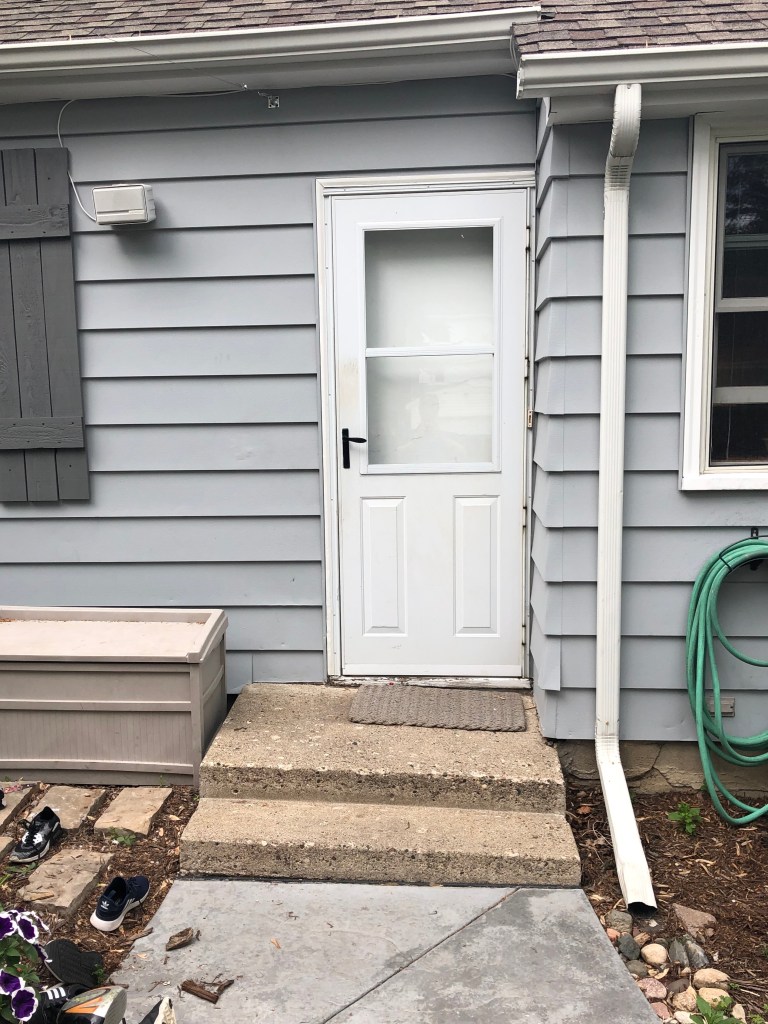
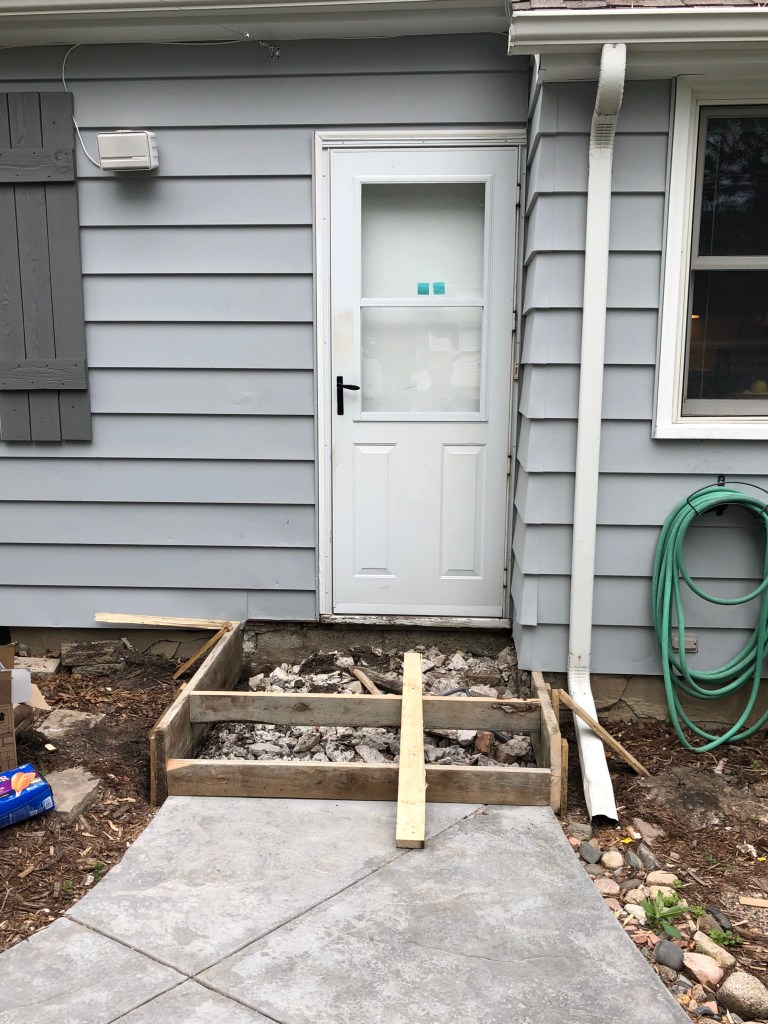
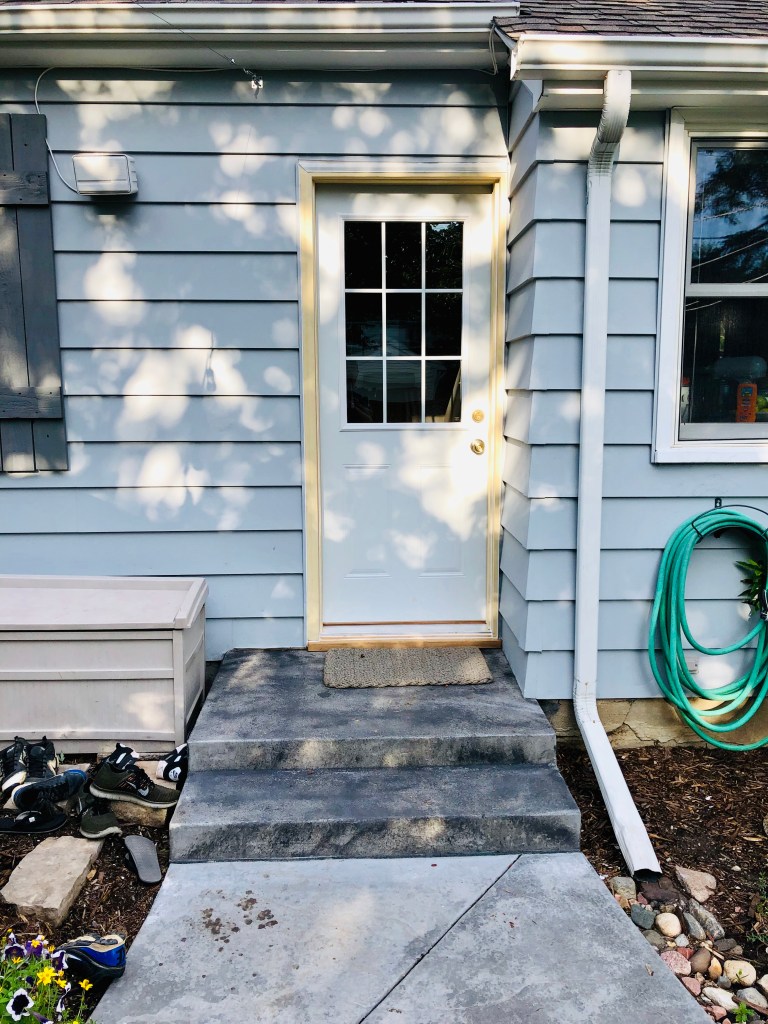
Around that same time, we had another house project happening that involved tearing out an old, listing concrete back step going into the backdoor of our house. What if…we placed a bit of PVC tubing that would run through the concrete steps and we could run the wire through the step rather than to have to go up and around the door? It just might work.
June 21st – Back step redo with electrical pass thru
I finally found an electrician who worked with my construction buddy. He came over and agreed that it could be done, and that he could help when he got some free time.
Then, came the permits. Building and electrical permits.
I was basically adding a massive heater to a little room directly below our bedroom. I needed to pull some permits. Ugh. The city of St Louis Park inspectors we’re the stuff of home-project crushing legend. Here we go.
Websites scoured, phone calls made. Drawings scribbled. Plans submitted. Plans denied.
Phone calls made. Plan submitted. Plans approved. Boom! Progress.
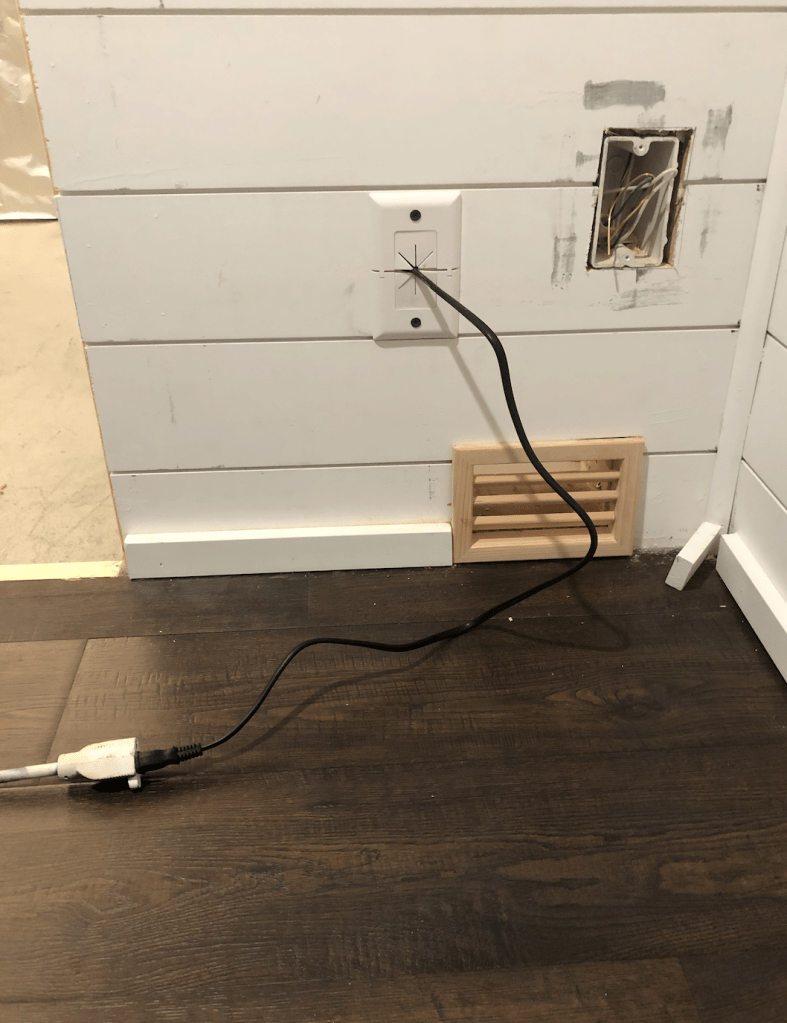
With an approved building permit from the city of SLP, my electrician was able to come by and run the wires from up out of the laundry room wall – bury the wires – run it through the newly poured concrete step – bury it again and pop it back into the sauna space into a tight little service loop close to the floor where the heater would end up going.
The wires were in place – she was roughed in. That’s electrical talk.
Next, I figured out how to add an exhaust vent fan through the ceiling of the sauna and into the changing room that would be vented to the outside wall – to get rid of any excess heat or humidity. Matt told me it wasn’t necessary but wouldn’t hurt to add in. So, I did.
I was ready for the next, itchy step. Insulation.
September 21st – Sound & fireproof/Insulation
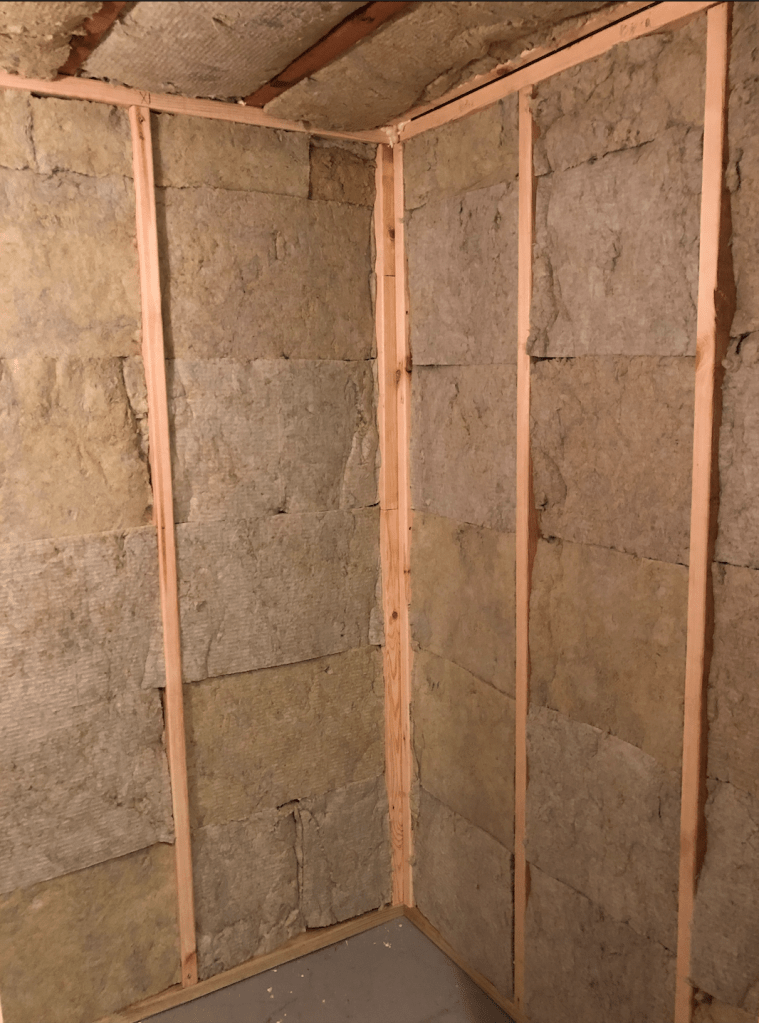
All my research was pointing me towards mineral wool batt insulation. It was sound proof, fire proof and could get wet without mold or any issues.
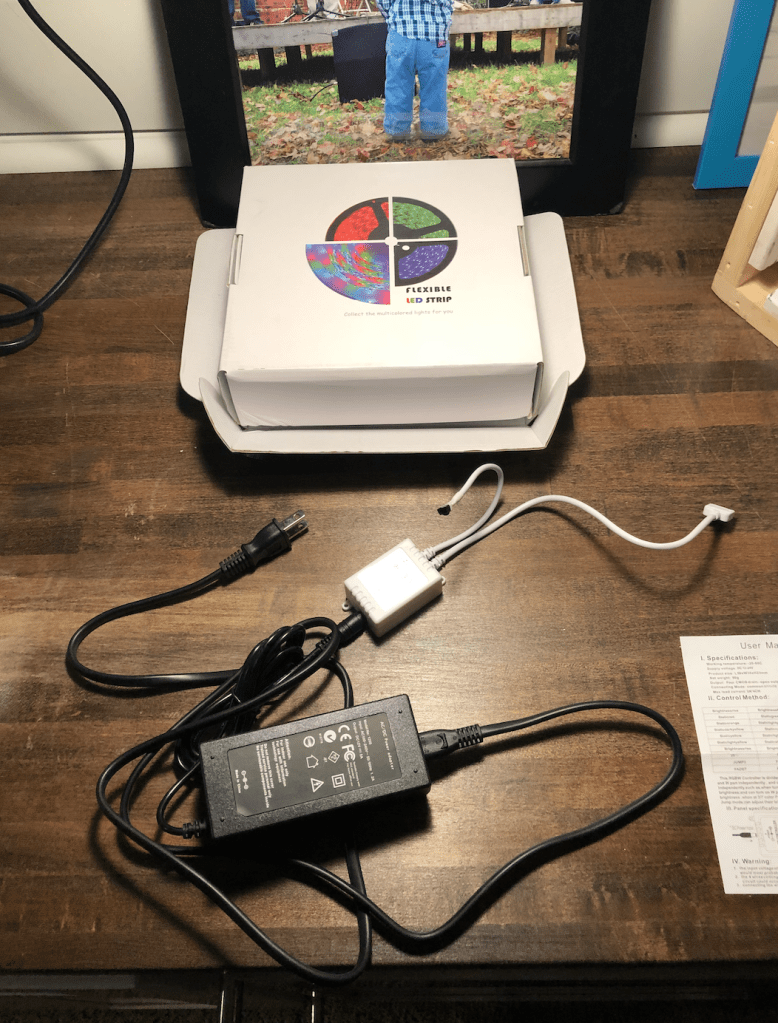
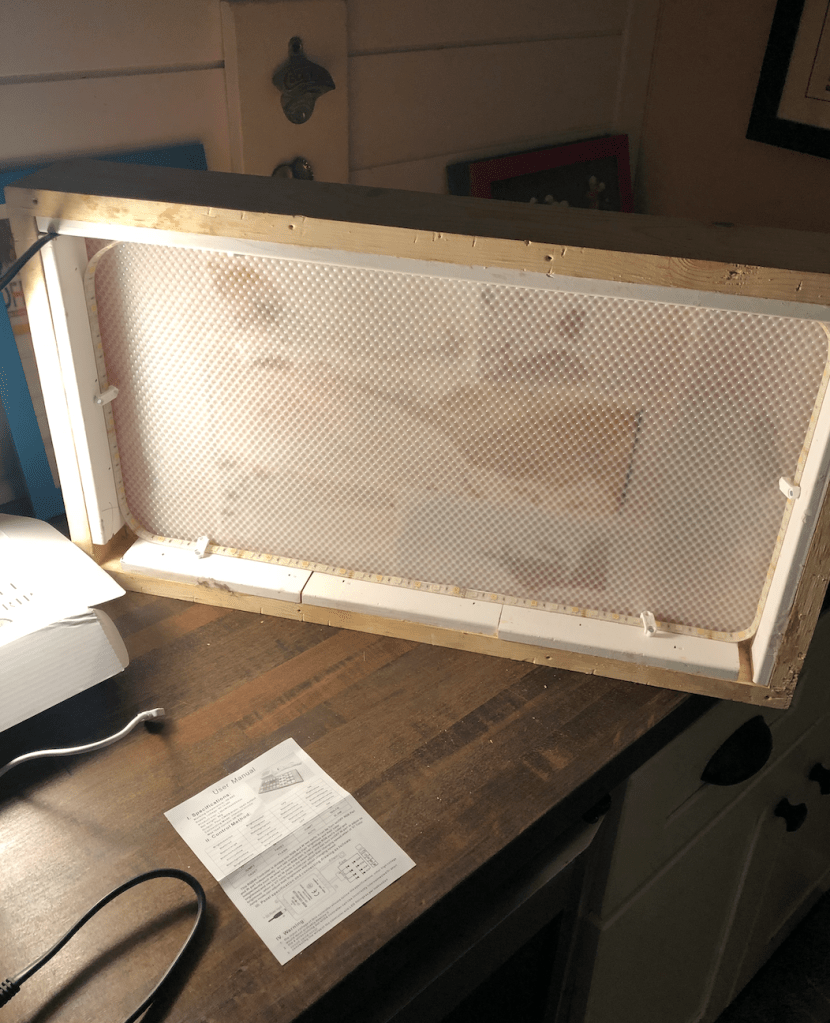
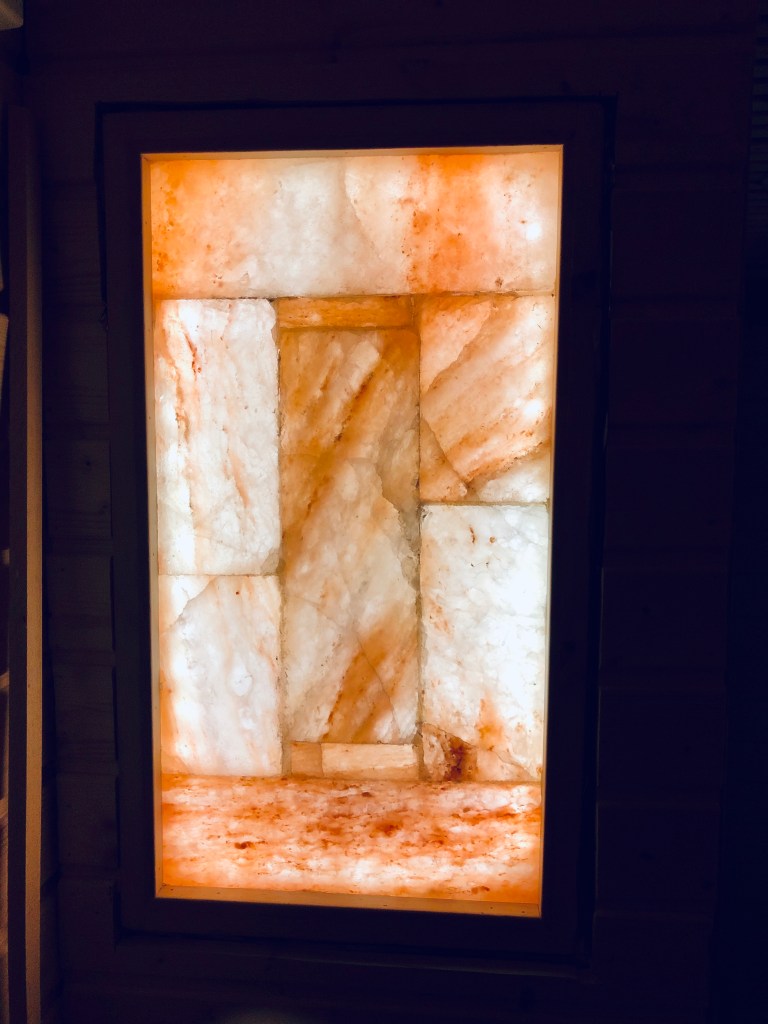
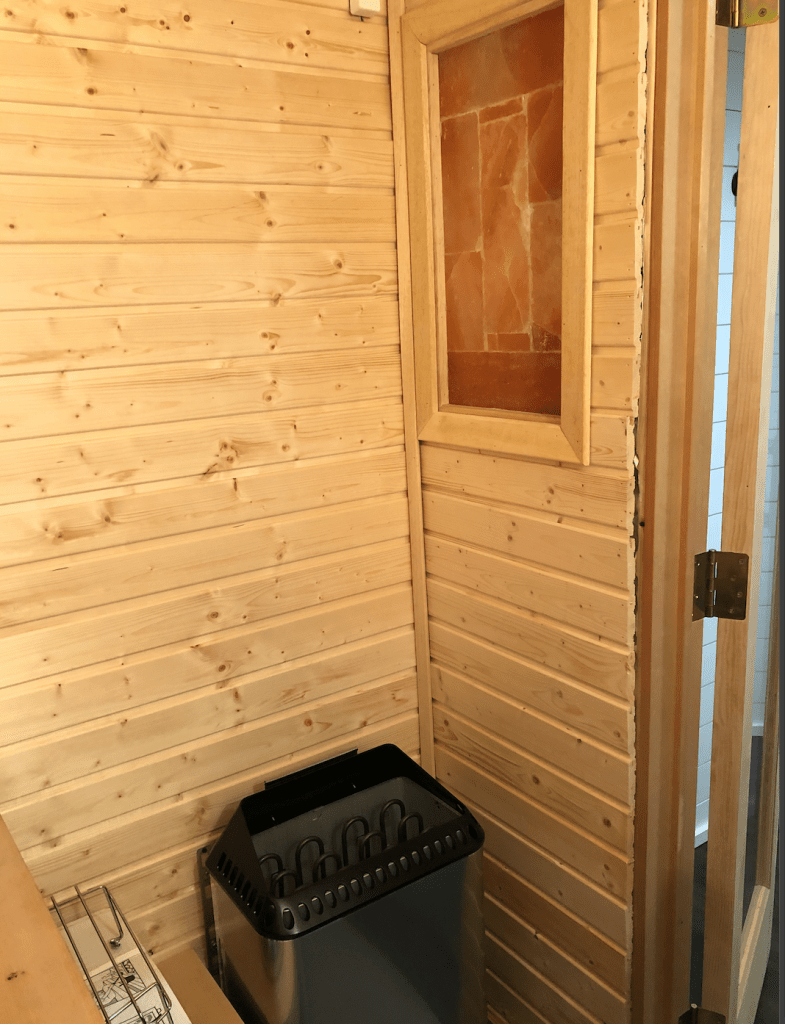
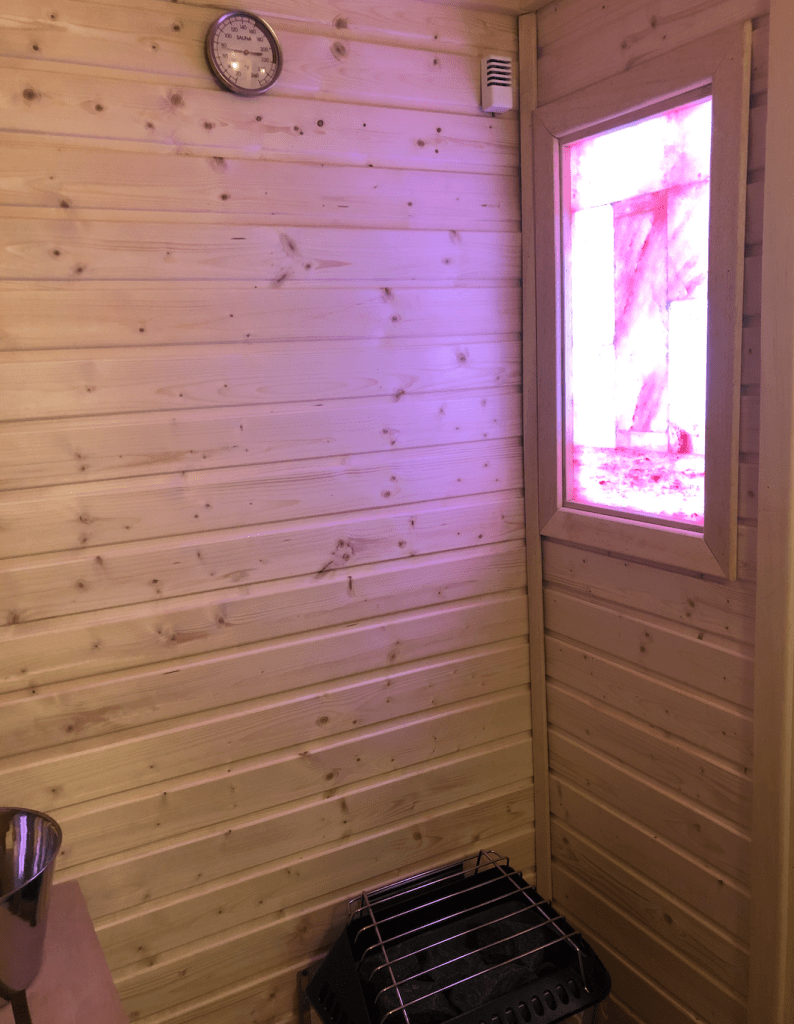
One of the other ideas that I had was to add a Himalayan salt brick wall backlit with led lights to one of the interior walls inside the sauna wall, by the heater. Thanks, Internet.
I did loads of research on this and beside all of the health benefits of positive ions released and general respiratory health, I just thought it would look really sick. Next, I had to figure out how to wire it – frame it into the wall and run the wire out to a new outlet plug that would satisfy the electrical inspectors.
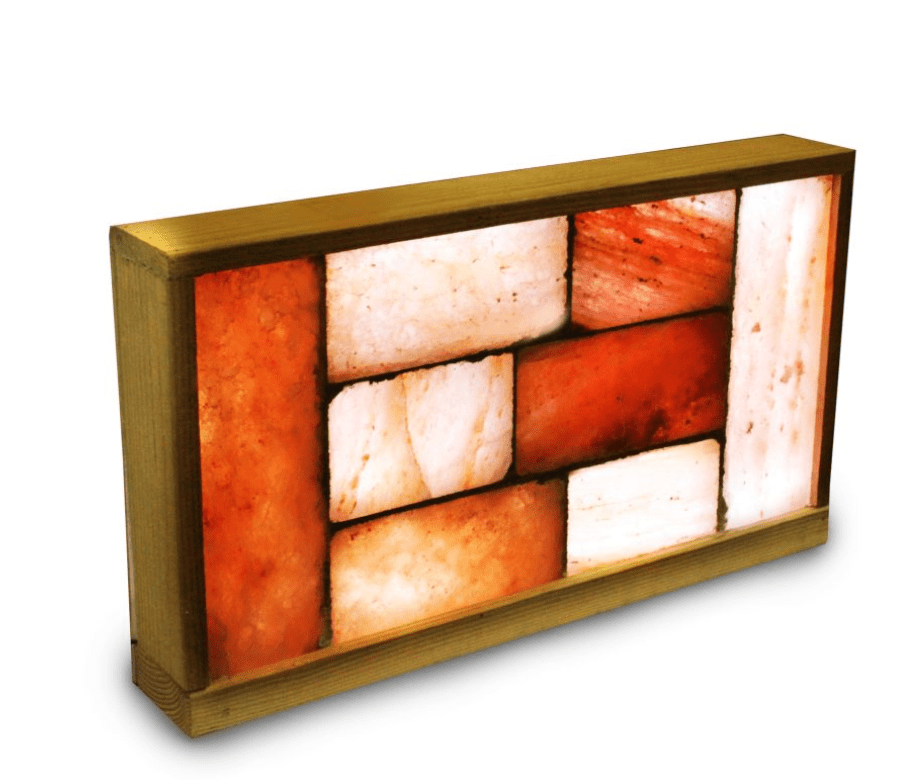
I ordered it from an awesome, left coast hippie company called, Spiritual Quest. Next stop salt cave sauna space – in my basement.
After many trips to Home Depot filling my car and lungs with mineral wool insulation I was done insulating my sauna room. All sounds were absorbed into it. It was so quiet you could hear your internal organs functioning. Like a recording studio – devoid of all sound. But, it was warmer. Not quite sauna warm, but warmer than the old root cellar.
Now, I began to get to work on the entry way to the sauna – the changing room.
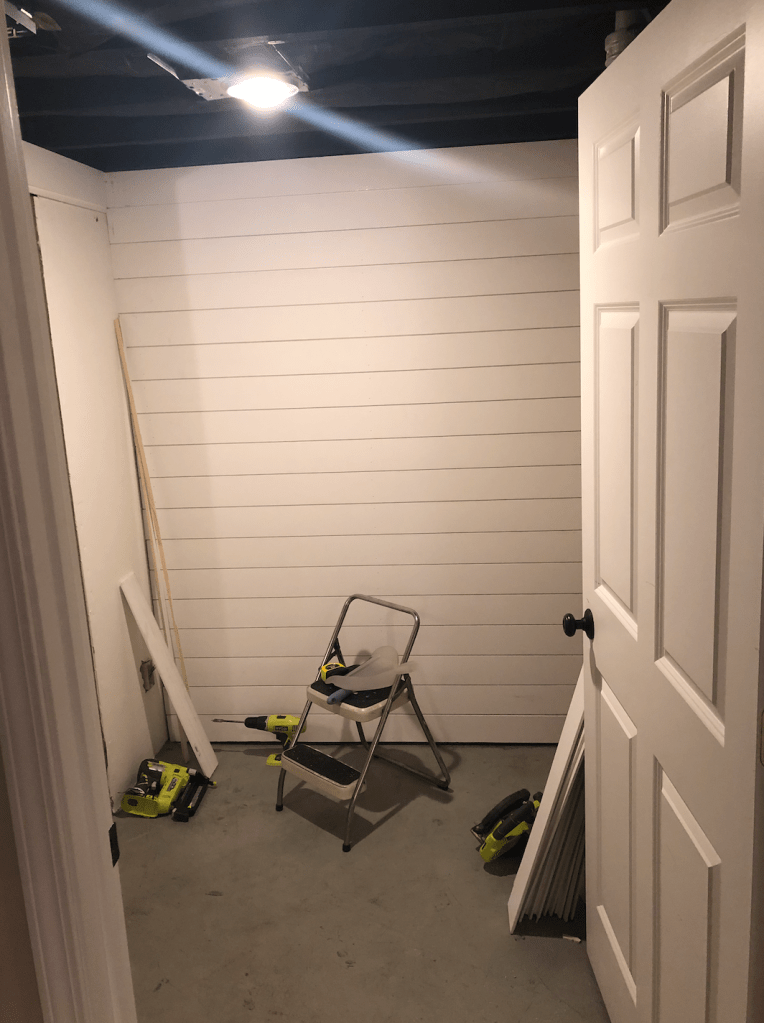
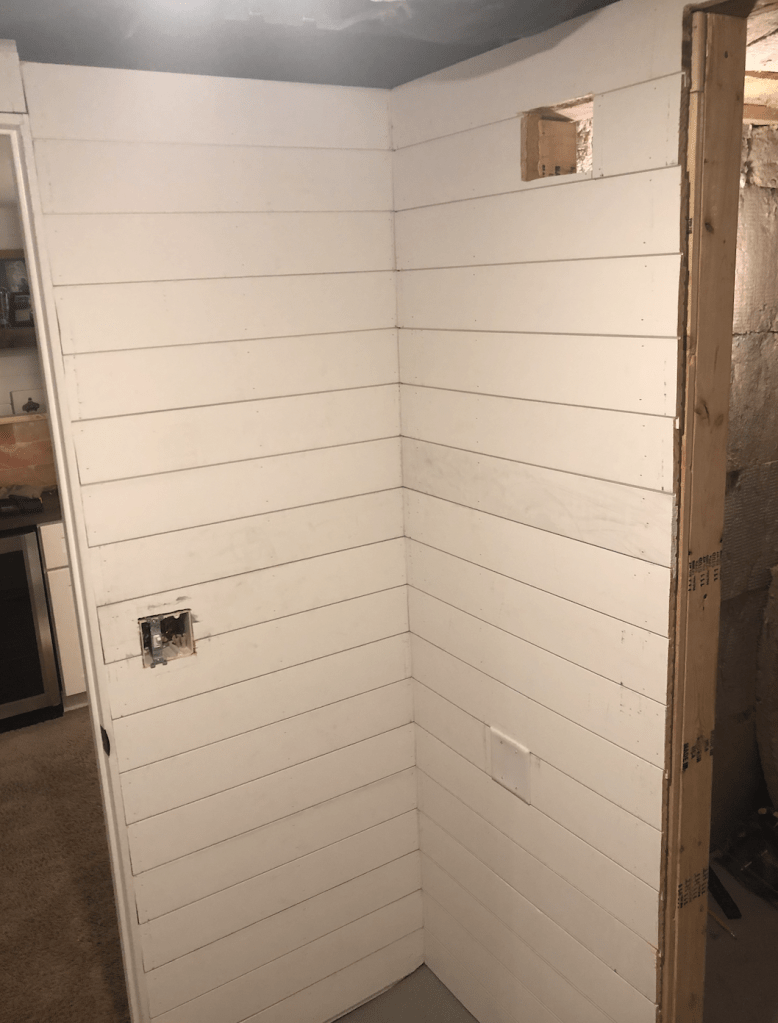
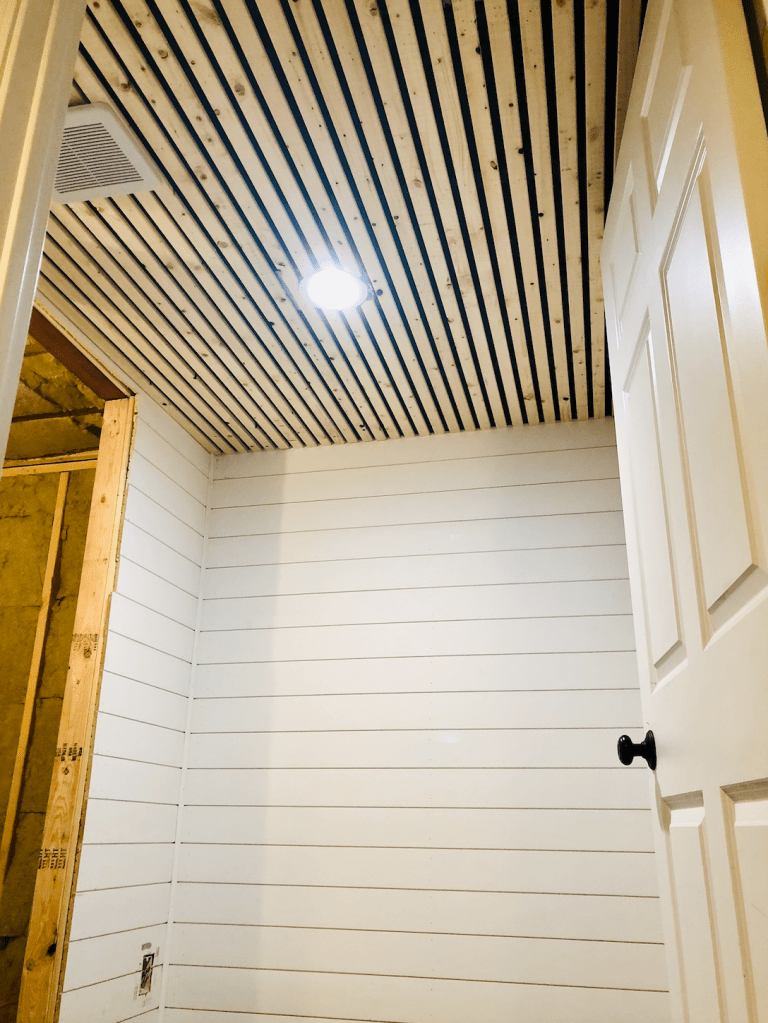
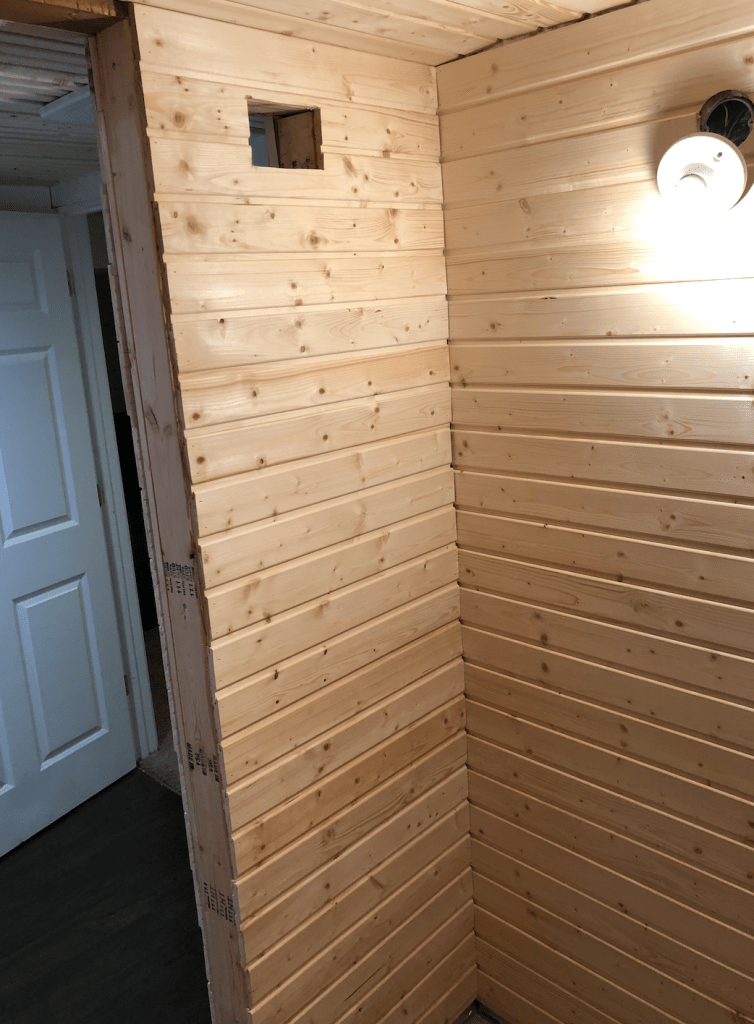
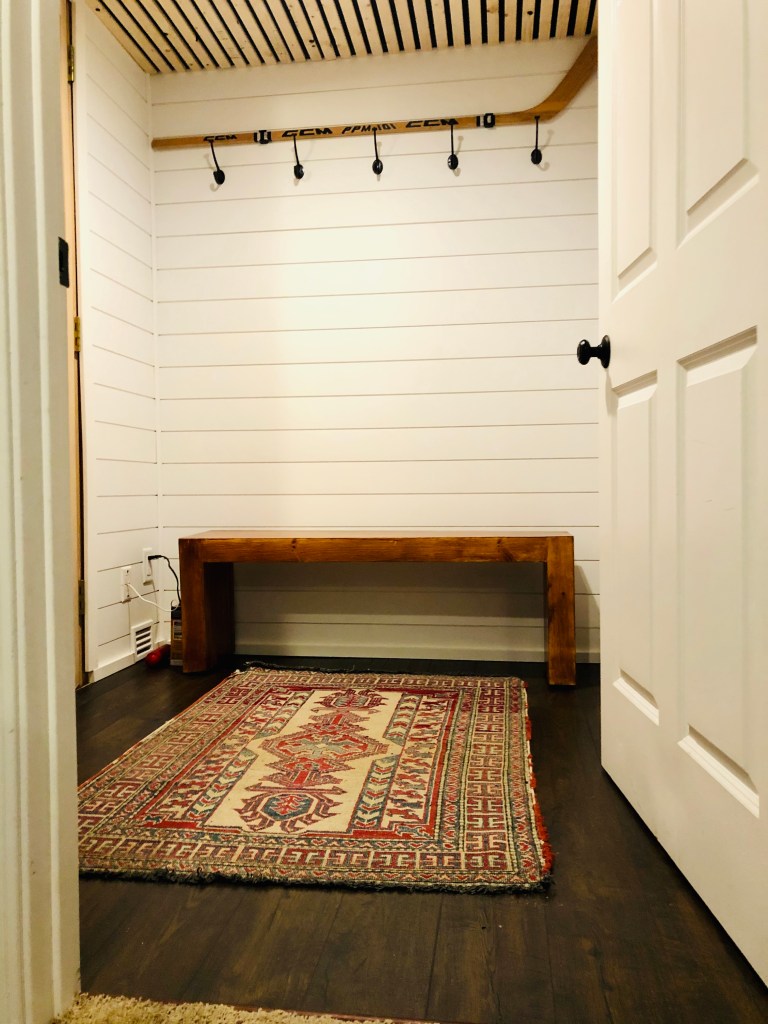
I insulated the unfinished walls of the changing room with more itchy insulation – standard R-13 faced rolls of insulation and added some extra 2×4’s for support over the pink rigid insulation over the concrete brick back wall. Then, back to Home Depot. My plan was to cover the walls with crisp, white tongue & groove shiplap pine. But, before I began that I wanted to deal with the ceiling in the changing room. I spray painted the entire ceiling of the changing room matte black – to hide it all above my floating wood ceiling strips. It was an awful process – and I’m sure there’s a better way, but I got it done. My three boys wanted to help, because – spray paint. But, once they saw me emerge from the heavily vapored room with black paint covering my face mask and glasses – they were glad they weren’t permitted entrance. It sucked, I was really light-headed, but done. Onto ship lapppin’ some walls.
I began with the first wall you see when you open the door and enter into the changing room. I began at the top and made damn straight the first board was level and damn straight. My new favorite toy was a Ryobi nail gun. The. Best. Thing. Ever.

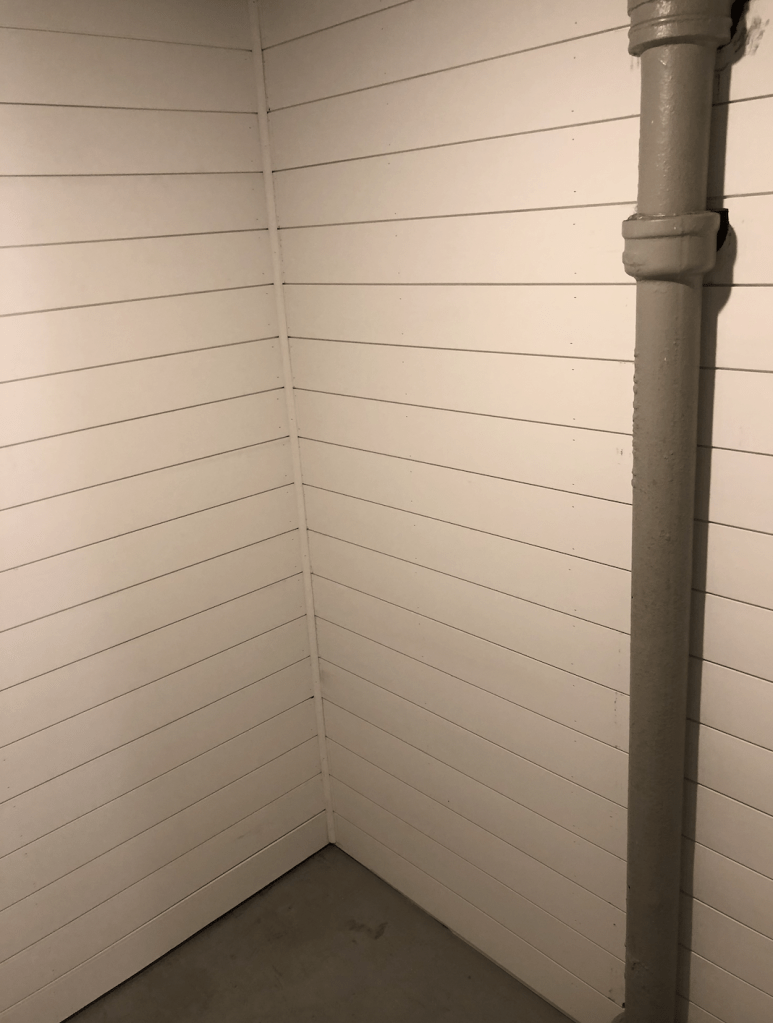
Cut, level, nail gun, and so it went all the way down to the bottom. It looked amazing – the room and my vision was taking shape quickly. Then on to the next wall and then the next and the final wall with an awkwardly shaped exposed pipe that was no fun and really tricky to have to make cuts around. But I did it and it was perfectly imperfect.
October 3rd – Shiplap it up
Next step was my Pinterest-inspired floating wood slat ceiling that would cover up my black spray-painted ceiling insulation and joists. I began at one side of the ceiling and continued on measure, cut, space, nail-gunned into the ceiling studs. I used unfinished pine furring strips, that are really cheap and look pretty cool while complimenting the actual Nordic spruce wood that will be in the sauna. I had to cut around the ceiling light and the exhaust fan, but it all went pretty smoothly. The changing room was taking shape. Walls were done. Nail holes patched and a coat or 2 of fresh white paint applied to the ship lap. The ceiling was done now, too. And it looked really sweet. Like, way better than I thought it would. Next step towel hooks and getting my son, Miles to make a bench in his High School wood shop.
October 16th – Raise the roof

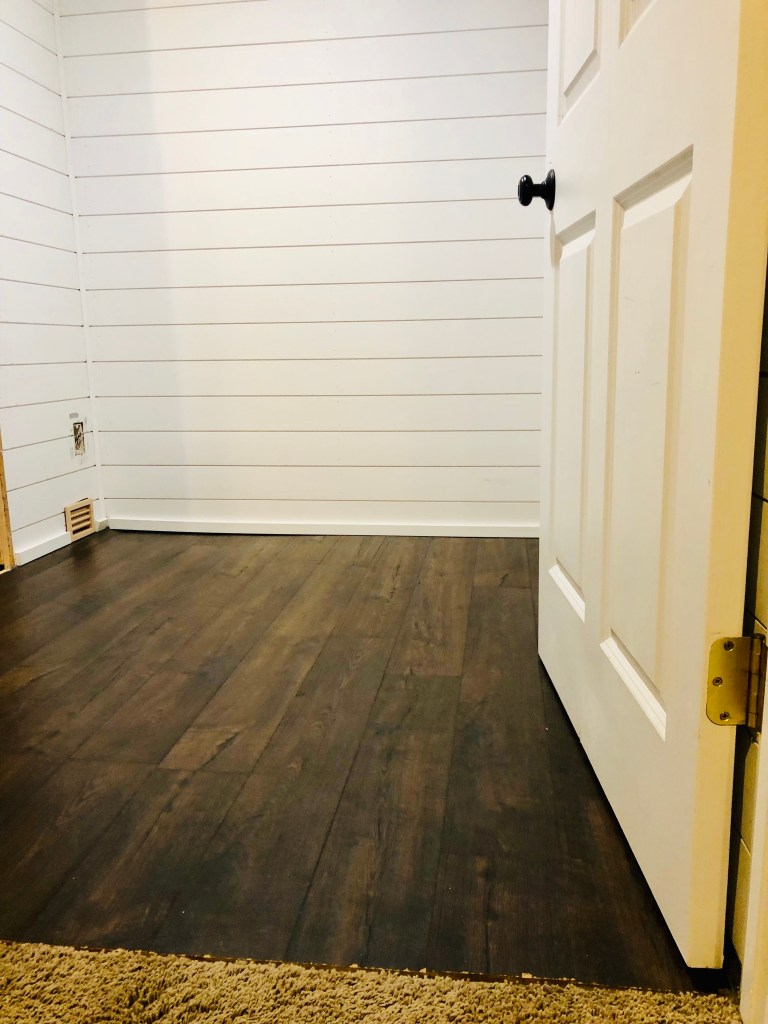
Now onto covering up the old gray concrete floor in the changing room. I found a floating wood-looking floor that looked great, was relatively cheap and claimed to be water proof. My son, Miles and I went to work and visited YouTube a couple times along our way. I underestimated just how much we needed, after a trip or 2 back to HD we completed the floor – with the recommended foam backer rod expansion in place around the perimeter and then I siliconed it all up tight around the edges to make it water and sweat-proof.
October 7th – Floored
My sauna connection, Matt filled half my garage while I was at work, with all of the sauna wood – tightly wrapped Nordic spruce in long boxes from Finland or somewhere with lots of umlauts. He also left gorgeous slated benches & back rests made of hemlock and lots of random trim and massive rolls of foil vapor barrier. I was getting nervous.
“Umm, will you help me install all this stuff,” I asked him? nervously. But, after seeing the ship lap changing room I had finished, he said I’d be fine. “It looks amazing”, he said.
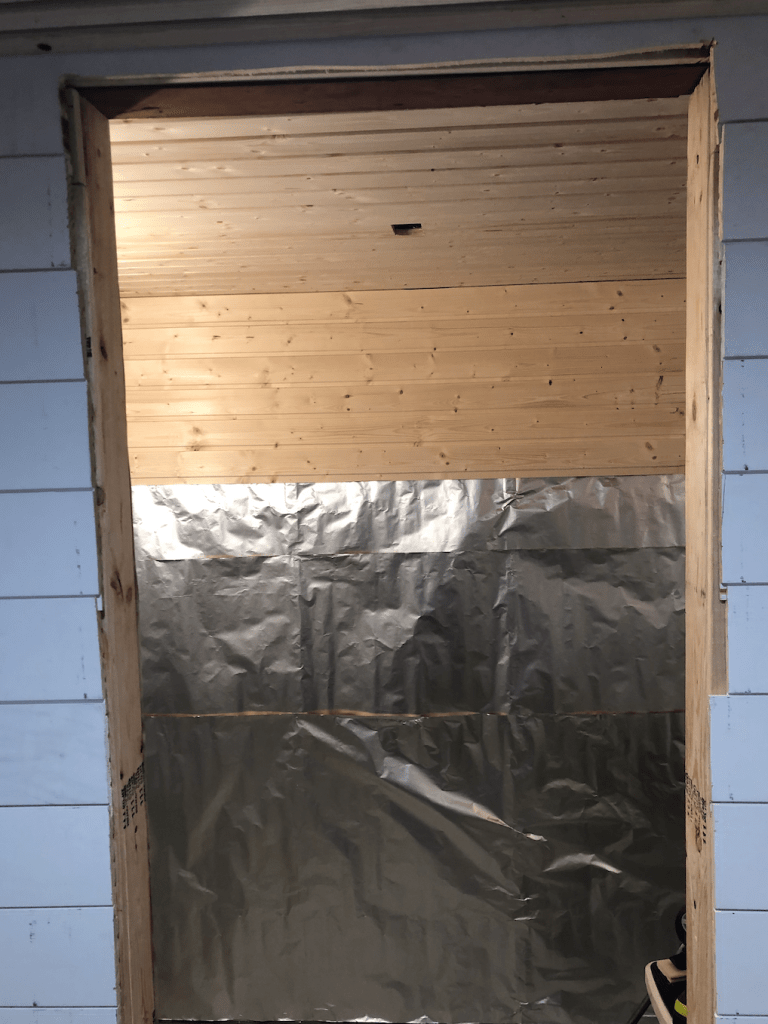
First step was to add overlapped foil to cover and seal all of the insulation on the walls of the sauna. I went and found my trusty black Swingline desk stapler and began cutting foil, stapling and swearing as I foiled up the walls. I would like to note that I did fully staple my finger, like deep and all the way down to the bone. I pulled it out and kept going.
I was bleeding. Again.
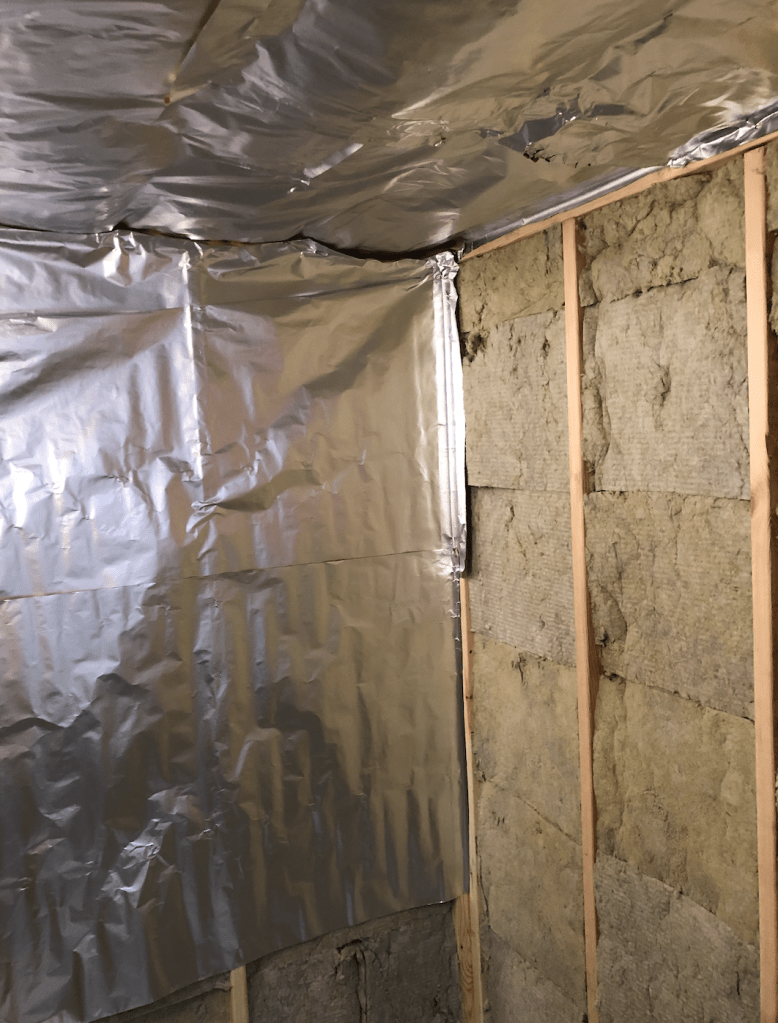
Foiling walls is like what I imagine wrapping a room for Christmas might be like. A big, shiny tin-foily room of a present in my basement. It was getting weird down here.
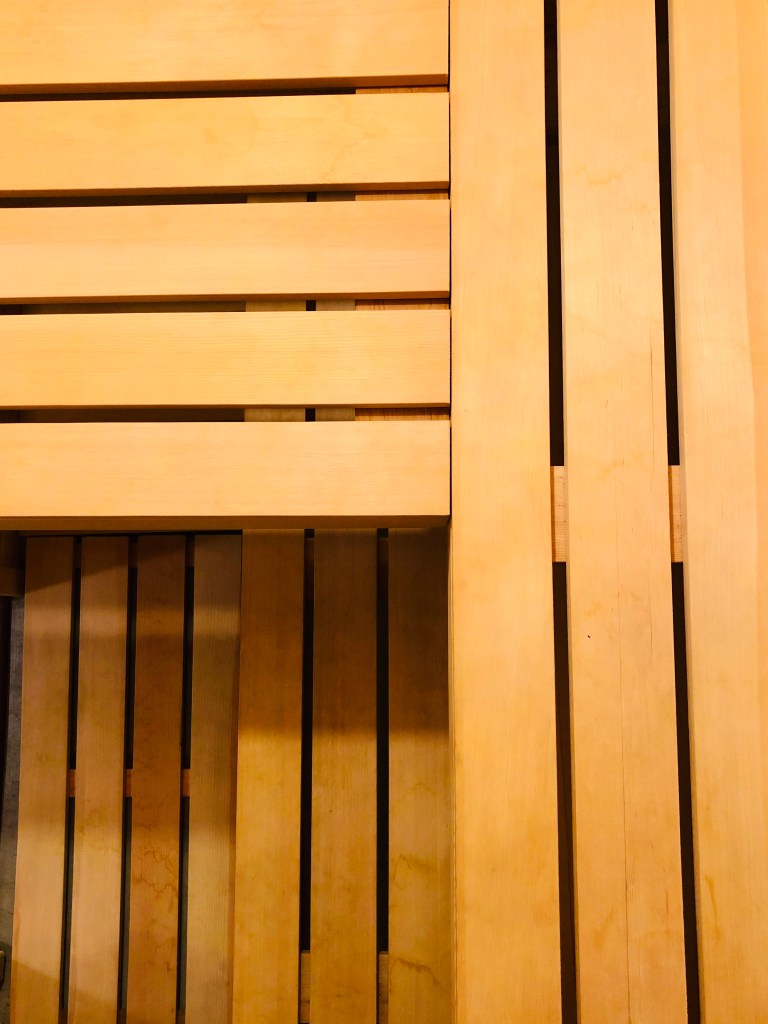
The next day, I began measuring and cutting the Nordic Spruce for the ceiling and walls of the sauna.
I started on the ceiling on the back side. Measure, cut, nail repeat – careful to hide the nails in the tongue as I went. I hid most of them. My motto along this hot box building adventure was again said aloud.
“Perfectly imperfect.”
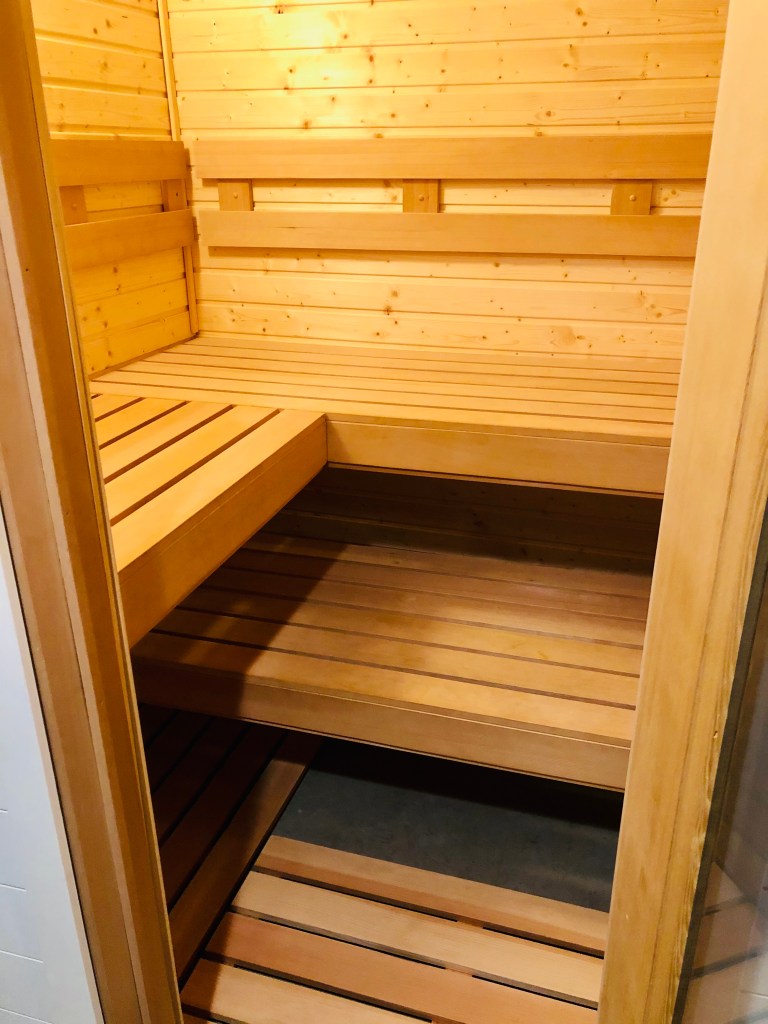
Then I started in on the back wall, then another and another. The room was beginning to look, smell and feel like a real sauna.
I finished the walls – added a wall vent low and below the heater and another up high on the far opposite wall simply venting out to the changing room.
Let’s install some benches.
October 9th – Tongue & Groovin’
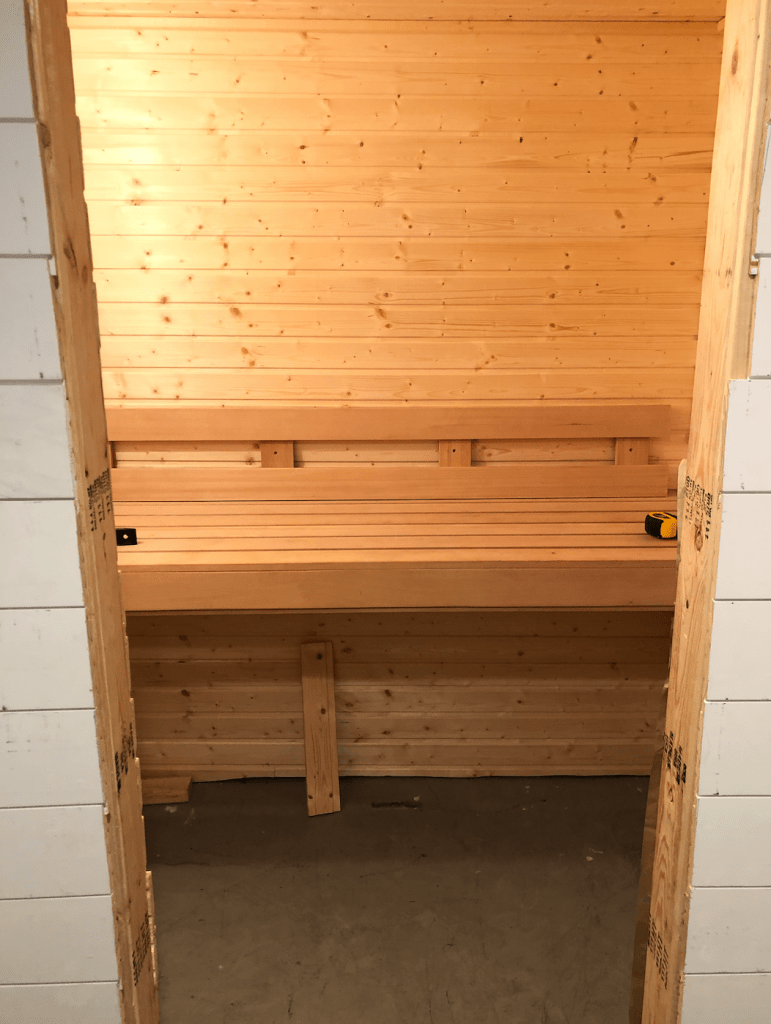
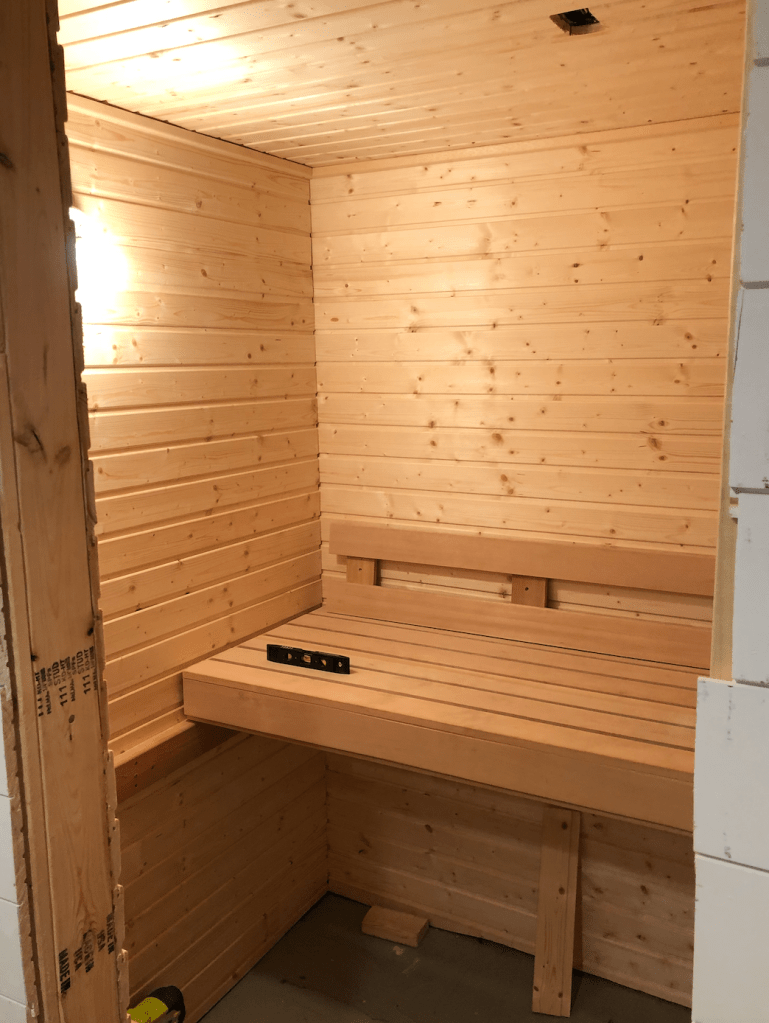
I leveled and measured some aromatic cedar 2×4’s and screwed the upper bench in to the studs – like a glove. I had to cut one of the benched down to complete the L upper bench. This was tricky, but I got it cut, reconfigured and then bolted the two benches together tight and screwed them into the wall studs to complete the upper bench.
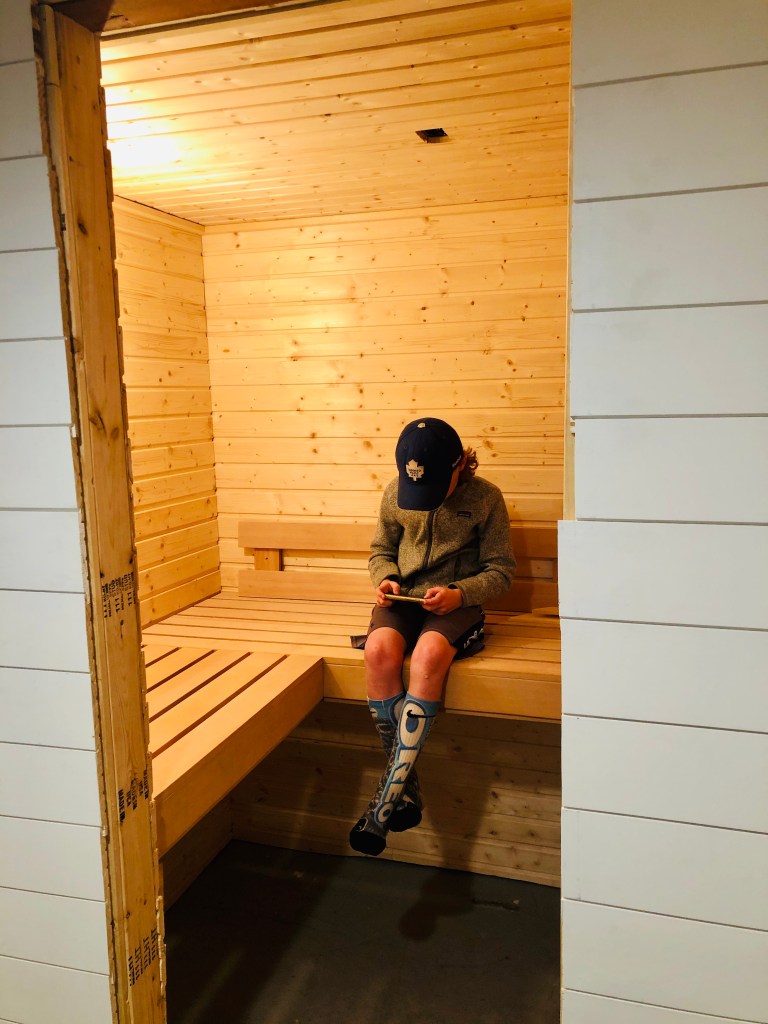
The boys all took a simulation sauna – sitting all in a row on the upper bench with their feet dangling down.
The glass door and sauna stove were delivered out to my garage the next day. Let’s go.
How hard can it be to hang a glass door? The interwebs showed me.
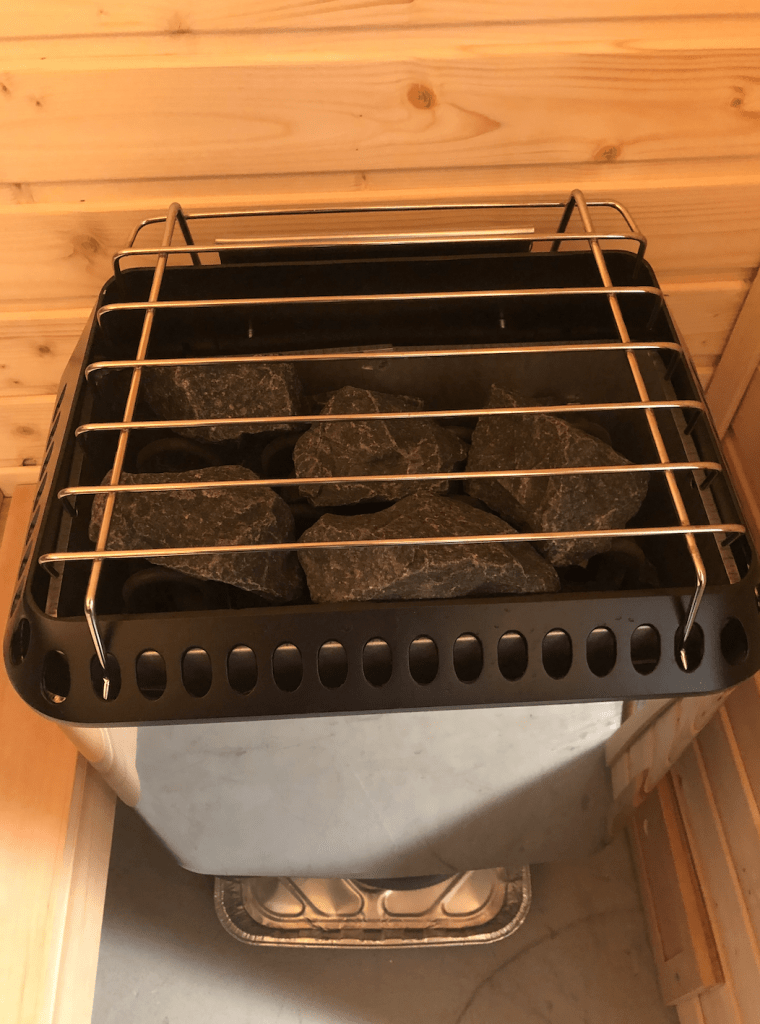
I kept at it, adding in trim and little bits here and there as time allowed on my weekends and late nights. Hung the heater onto the wall and added in the rocks.
I added in the lower bench – set back a way under the upper bench to have some room on the ground for access in from the door.

Time to deal with the door – just getting a door through the door of the house was a treat – she was a heavy, no joke, double-paned glass door.
I removed the door from all of the packaging – pulled the transport nail from the base and slid it out of the packing frame.
We slowly walked it over to its new home.
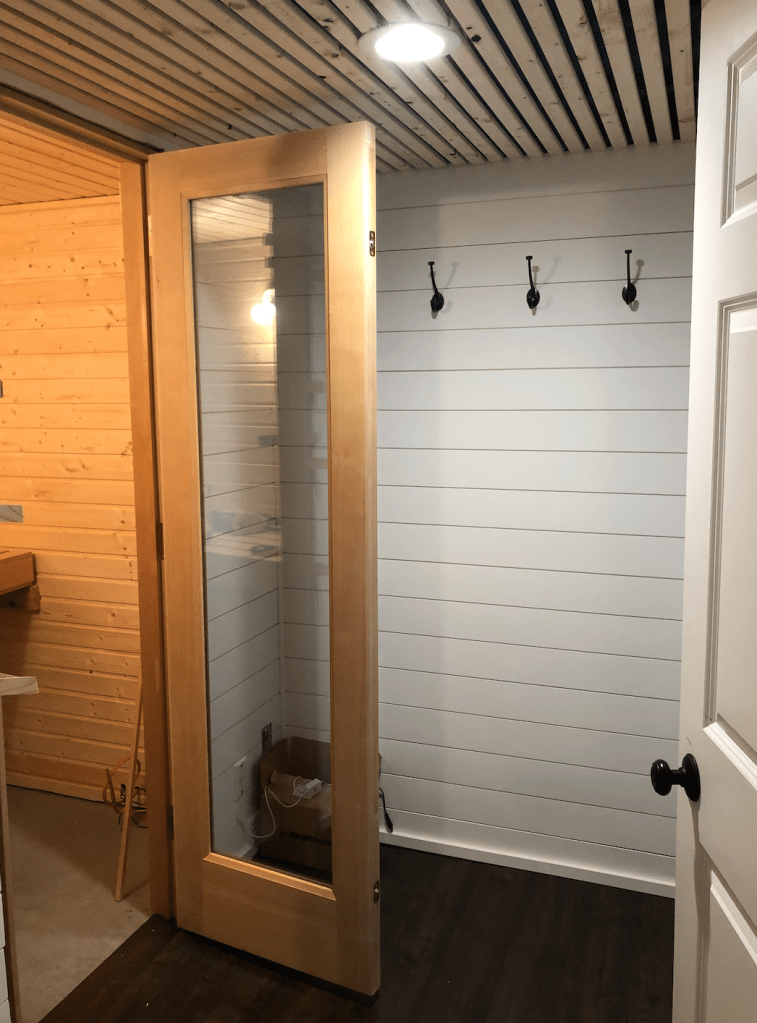
After much deliberation and moving it into the frame and back out – and adjusting with lots of shims. I had to add some flooring scrap piece under the door’s base to raise it up a tad – and then I screwed her in place and closed it up. Snug and plum solid.
Then I had to add in the door catches to help it click into place squarely and securely with the heavy satisfying thud of a bank door.
October 19th – Door & Shim city
I pushed spare bits of mineral wool insulation into the gaps in the frame, cut off the long bits of shim and added some finishing trim to the inside and out.
Matt had not left me a handle yet for the outside of the door, so in order to close it, I made my own. Fashioned out of a piece of an old, broken composite Bauer hockey stick of my son’s. (we have a graveyard pile of old sticks out back)
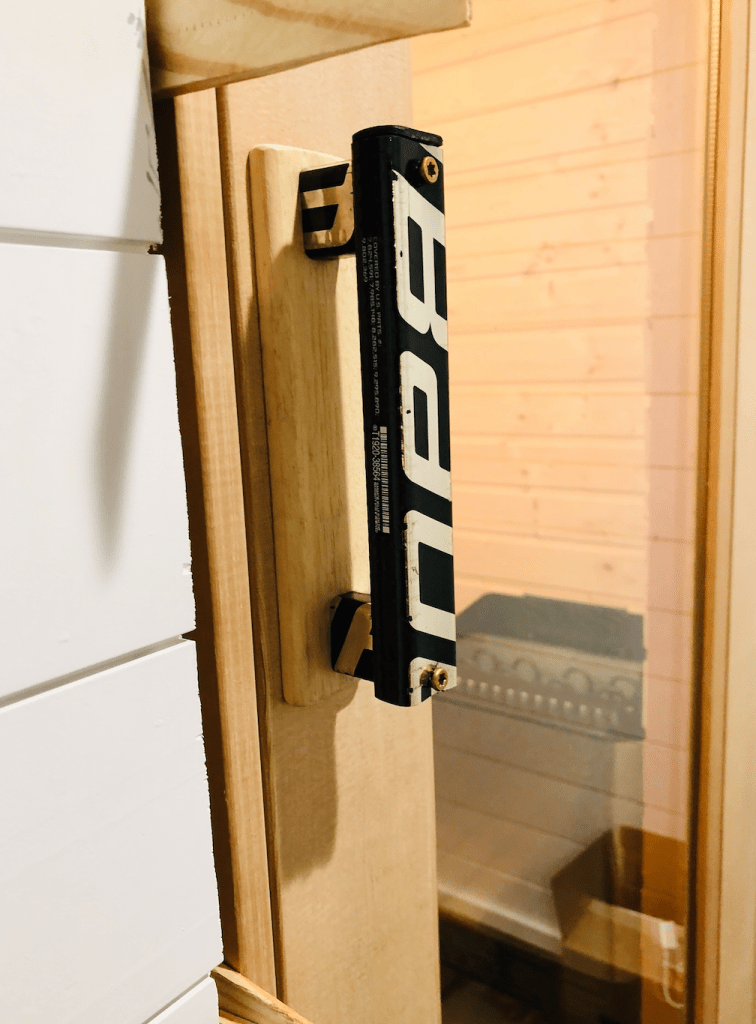
It looked really amazing – and worked well with the tacky grip.
Matt did, deliver a nice, wooden Finnleo handle for the inside of the door later in the week. I’ll keep it, but doubt I’ll change the stick handle.
October 25th – Power up
My electrician was scheduled to come over Friday morning to hook everything up and bring this project to life. As he was doing his thing – I had to head down to Rochester for a hockey tourney game at 11 AM…on a school day. He was whistling when I left.
From the cold bleachers of Graham Arena, Pete called me saying that it was all hooked up, but the small black control wire was just a tad too short to reach and hook up the heater. It was short by Like, by an inch. Ugh. I would have to wait until I returned home to figure it out.
October 27th – Inaugural Sauna sesh.
On Sunday night I finally got back home after an exciting weekend of hockey back in my old home rink, Graham arena and got back to work.
I found that the control wire jutting out of the wall – looks just like a black phone wire. And it had to clip into the underside of the heater, like phone cords clipped into old school phones. It was literally half an inch short. The wire was like 17’ long so, it must have gotten bound up in the wall when I added the Nordic spruce paneling to the last row with a small hole for the wire. I grabbed a long screw driver and pried at the hole being careful not to damage the critical wire – and after some really awkward upside-down body contorting yoga moves and some swearing (it helps) I was able to jimmy it free and bought a couple inches. I stretched the wire, and…
Click. We’re in business. I almost ran to the electrical box in my son’s room across the basement and hesitantly flipped the hefty 240-power switch freshly marked – sauna. I ran back over to see that the all-white Finnleo control panel was lit up like a Christmas tree. She was alive!
Flipped the switch 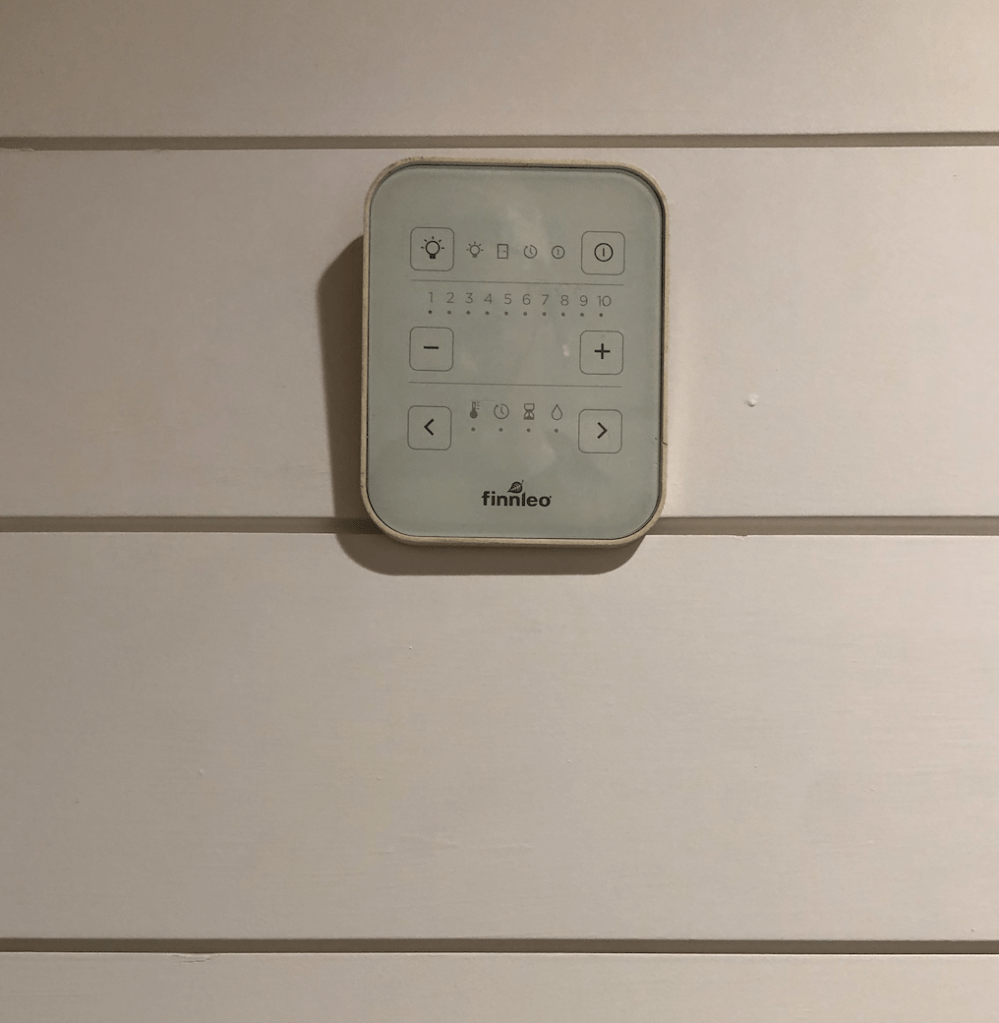
Control panel 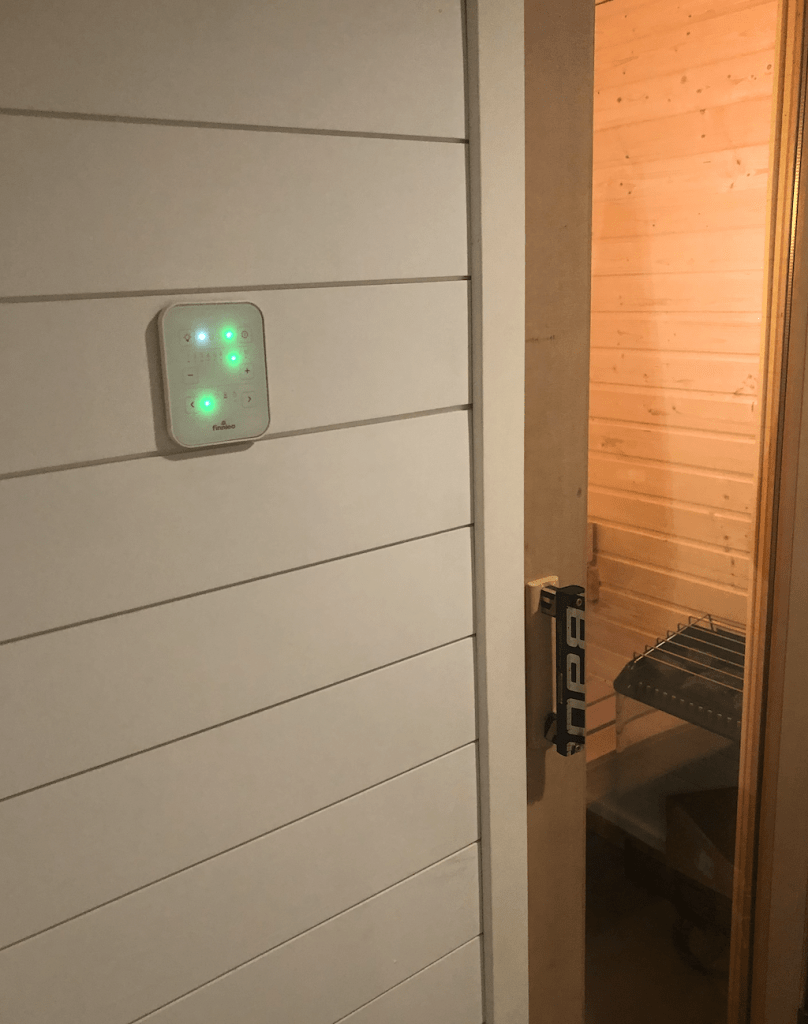
she’s alive.
I quickly flipped through the manual once again and touched the top power button with my finger. Through the glass door I heard the heater make an audible clunk and the light started to flash indicating that it was on and heating up.
My 3 son’s all rushed down stairs and couldn’t believe it. It was actually on. All of the sawing, nailing and swearing that they’d endured for months was over. We were moments away from our first sauna – in our own home.
I had previously researched, purchased washed and folded ten fresh sauna towels that we’re waiting in a basket by the door.
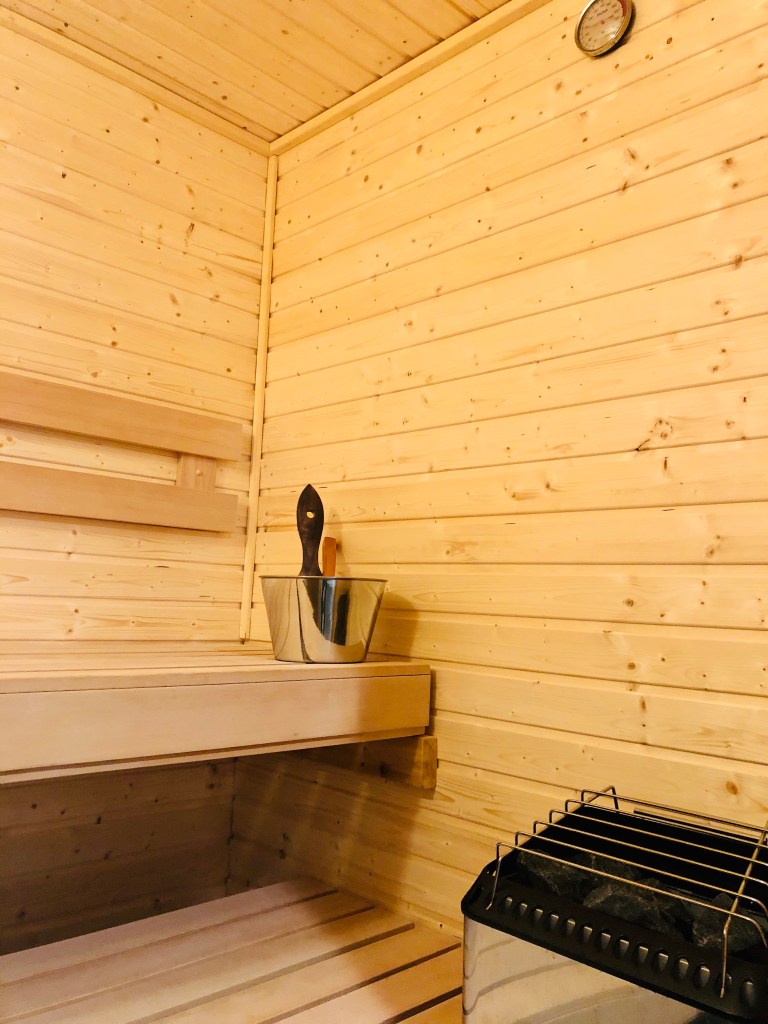
My son Miles and I had the first sauna, as he helped me quite a bit along the way. We wrapped up in our towels and opened up the door and stepped in.
It was magical. And it was hot. “It’s like a sauna in here”, Miles said – he’d been waiting to say it first. I had to text and ask my sauna guy, Matt almost for permission to see if it was OK to throw water onto the rocks. He texted “You bet! Have fun.”
And we did. After our initial 15-minute ceremonial first sauna sesh. We invited in all of the Rider boys plus their best buddy, Jr.
We did it.
I poured a generous helping of water from wooden spoon-like ladle from the shiny new bucket onto the hot rocks in the stove hissed and released the sweet Löyly into our home and our lives.
So, I built a sauna…and it changed my life.
Gallery


Special thanks to.
Matt Bergstrom: Helo & Finnleo Sauna Master (Finnish)
Electricians: Pete Chisel (?)
Framing: Poul Andersen & team (Oklahoman)
Sauna enthusiasts: Dr. Pat O’brien (Irish) Carl Hoikka (Finnish)
Dumpster access and random building advice: Brian Hogan (Irish)

